SUMMER’25 – New User Interface for Agentforce Prompt Builder layout

Have you recently witnessed some changes on Prompt Builder layout, since last Salesforce Summer’25 release upgrade ? Do you ask yourself how it will impact the way you write your prompts now with this new Agentforce Prompt Builder layout ?

If you had taken some modules on Agentforce, or if you are in your way throughout the « Agentblazer journey« , you have certainly already played / used former Prompt Builder.

Same thing if you have already taken / passed the Agentforce Specialist certification exam (previously known as AI Specialist) !

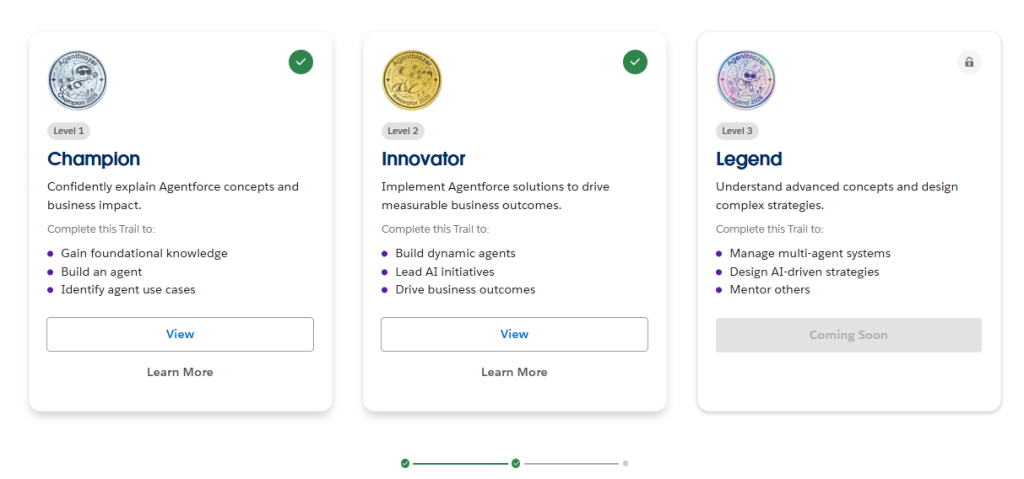
Agentblazer journey – Follow this journey to improve your skills on Agentforce

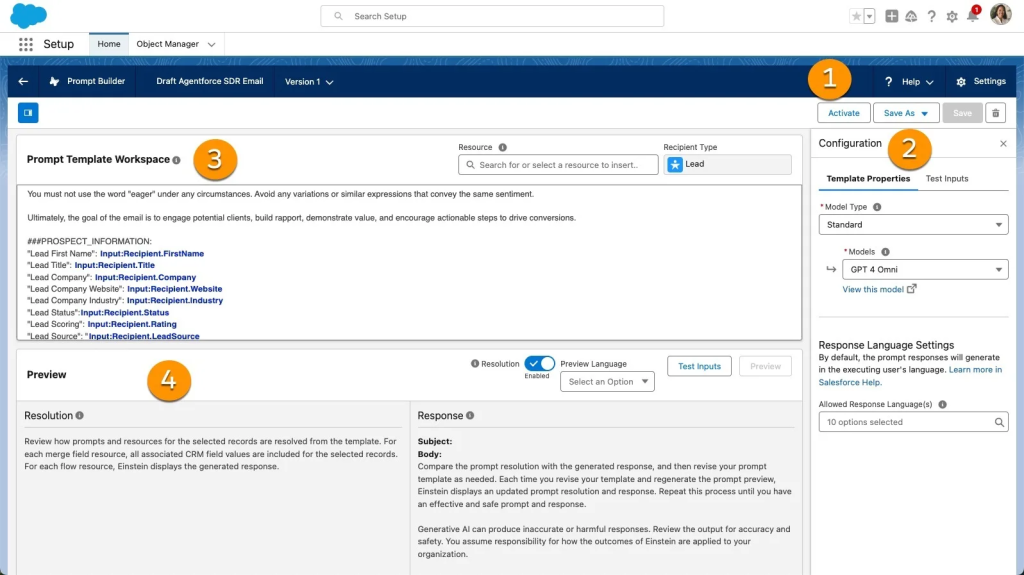
Before the latest changes, the screen was organized with :

  • the prompt, on the top part,
  • the preview part (resolution & response panes) on the bottom part,
  • and the template configuration pane, on the right side of the screen

Resources-related part was on top of the prompt section, and the input part (to test the prompt with record data) on top of the response section, in the middle of the page.

Summer’25 Salesforce – Prompt Builder UI changes – Former Prompt Builder UI
Screenshot from « Agentforce SDR Setup and Customization » Trailhead module
« https://trailhead.salesforce.com/it/content/learn/modules/agentforce-sdr-setup-and-customization/customize-agentforce-sdr »

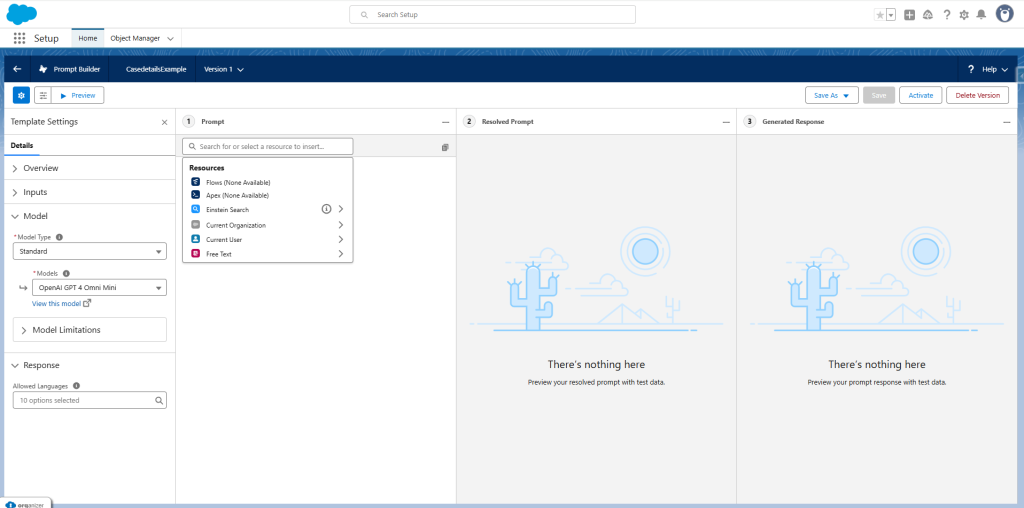
Now, the view are side to side, with a dynamically collapsible / expandable approach, allowing to get a full page view of each of these parts.

Summer’25 Salesforce – Prompt Builder UI changes – New UI with all panes displayed

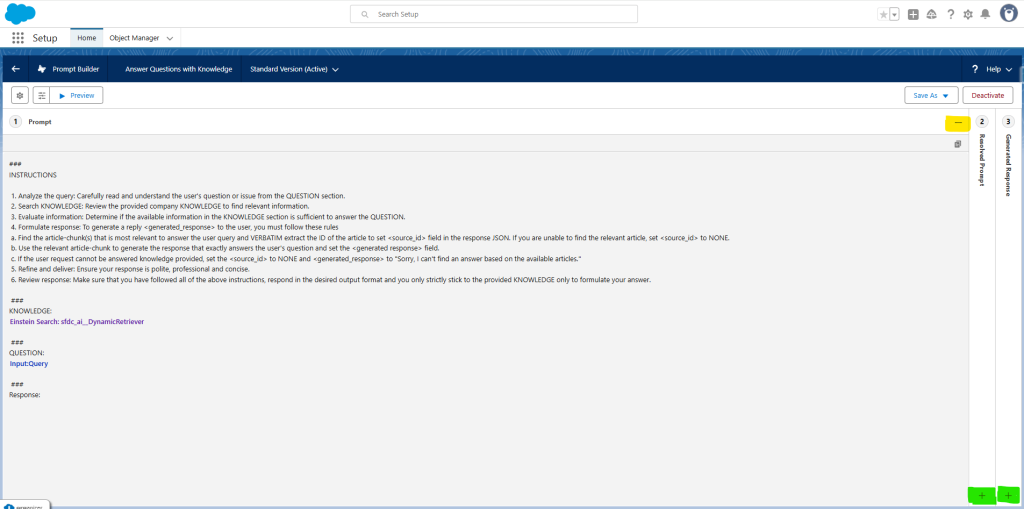
That is particularly useful when prompts – and answers (in this case, expand the « Generated Response pane » to get a whole page view on the response) – are long or text-formatted.

This way, you avoid scrolling down too much.

Summer’25 Salesforce – Prompt Builder UI changes – New UI with Prompt pane expanded

Each part could be collapsible with a click on the « – » button (in yellow in the screenshot), and could be also expandable with a click on the vertical ribbon or on the « + » button (in green, in the same screenshot).

Concerning the resources, they are still present on the page :

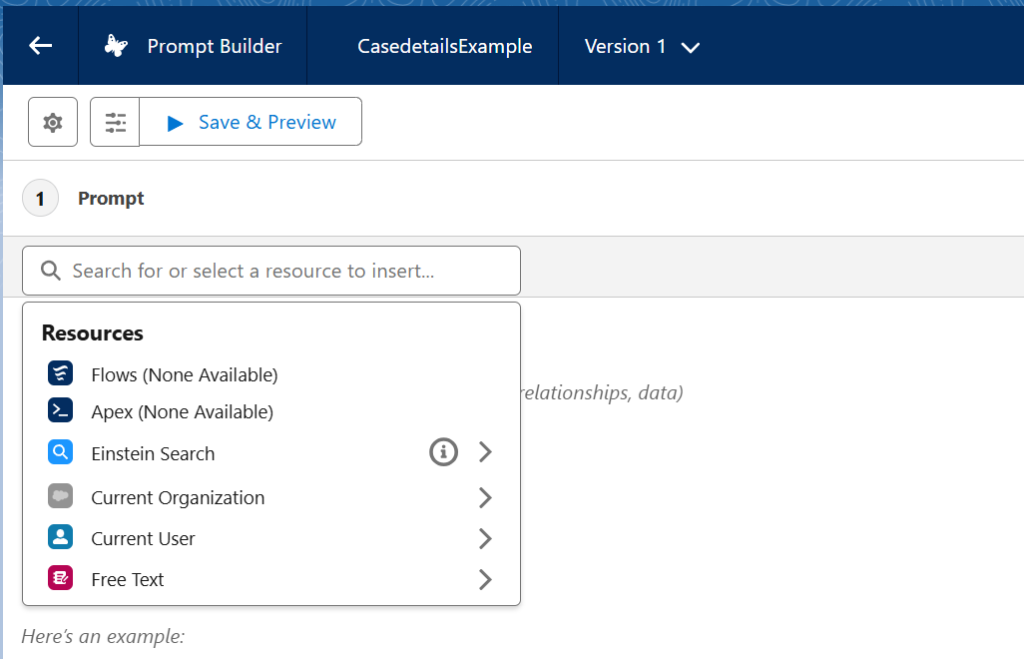
  • click on + Insert Resource, to display the possible resource types to add to your prompt
Summer’25 Salesforce – Prompt Builder UI changes – Insert Resources
Summer’25 Salesforce – Prompt Builder UI changes – Possible resources types to insert into your prompt

Same thing for the input parameters to test your prompt with. You need to click the Properties button to open the Template Settings pane, as shown below :

Summer’25 Salesforce – Prompt Builder UI changes – Open Template Settings button to open the pane

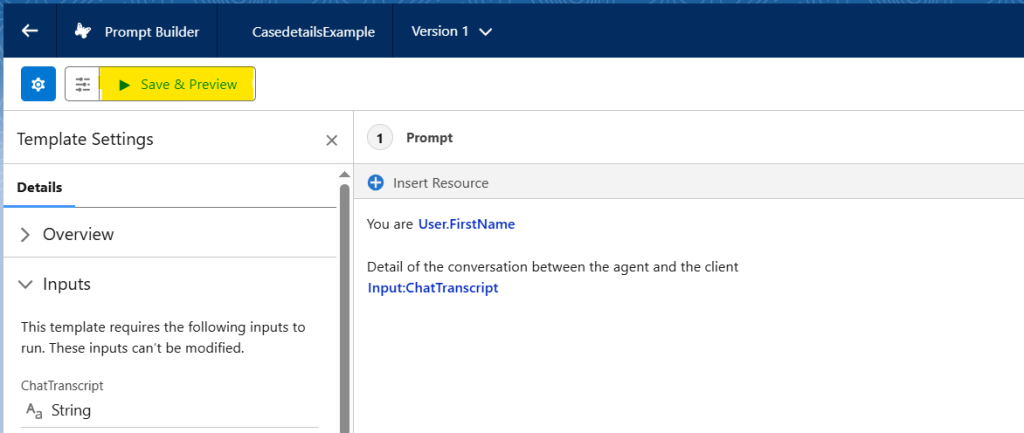
This pane allows you to visualize the required inputs to add to your prompt, to allow it to run, and then preview it, by entering any additional free text input resources.

Summer’25 Salesforce – Prompt Builder UI changes – Save and preview to test the prompt
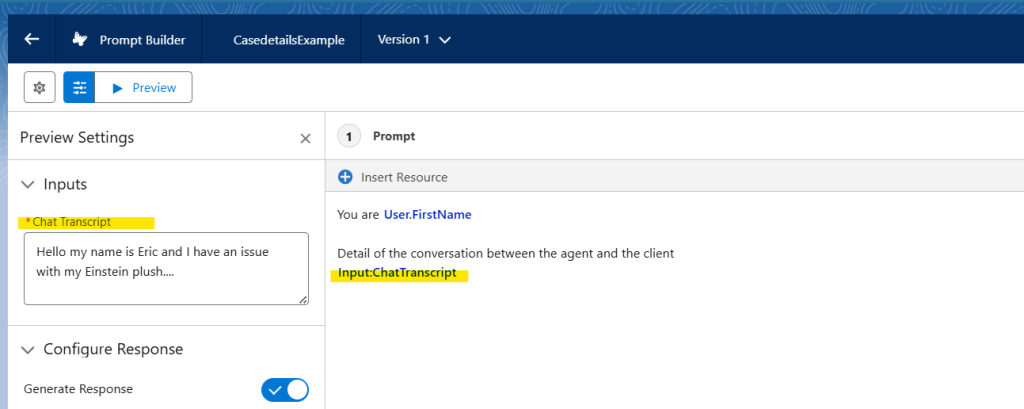
Summer’25 Salesforce – Prompt Builder UI changes – Preview settings pane

To be honest, I was not a big fan of this new UI.. but I admit that I have played a bit with it, and became used to it. I still prefer the previous Input section, but I suppose I will get used to it too ! 😀

Have fun prompting !


To read more on the subject


TDX’25 – Free Salesforce Developer Edition with Agentforce

One of big announcement of Salesforce TDX 2025 is the possibility to provision a developer edition with all Agentforce related features available in it. We will show how to provision it.

And great precision – compared to former Agentforce / Data Cloud playgrounds with which you may have played for your Trailhead modules so far – this Agentforce-fueled Dev Edition is available as long as your regularly use it (one login every 45 days !).

The QR Code to flash to get your own AI-fueled personal Dev Edition

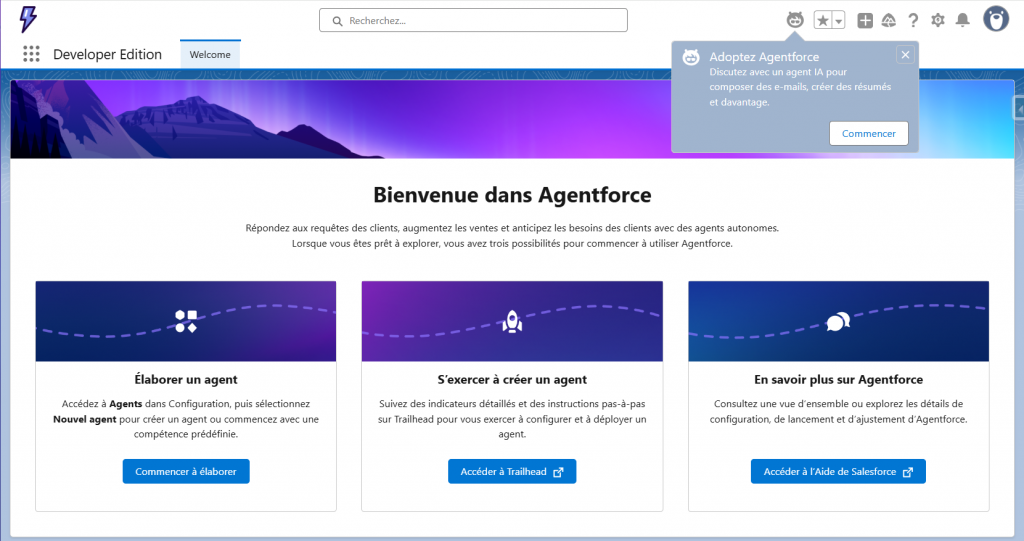
Agentforce Dev Edition home page

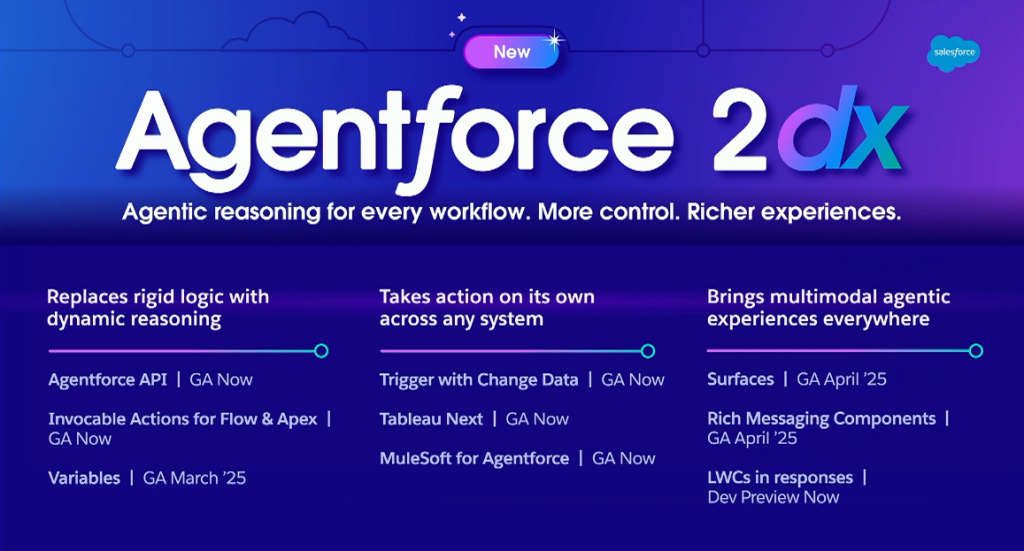
For information, other news about Headless / Agentforce API have been shared during this session ; Agentforce is not only used by an human

New features related to Agentforce, centered on enhancing the interaction with the platform

This communication echoes some previous materials shared by Salesforce teams, like the two following ones, available in Youtube, on Salesforce Developers‘ account, published a couple of weeks, before TDX’25 event :

More to read in the coming weeks, for sure, to see all new use cases possibilities !


To read more on the subject


SPRING’25 – Add a limit on Salesforce Flow’s GetRecord elements

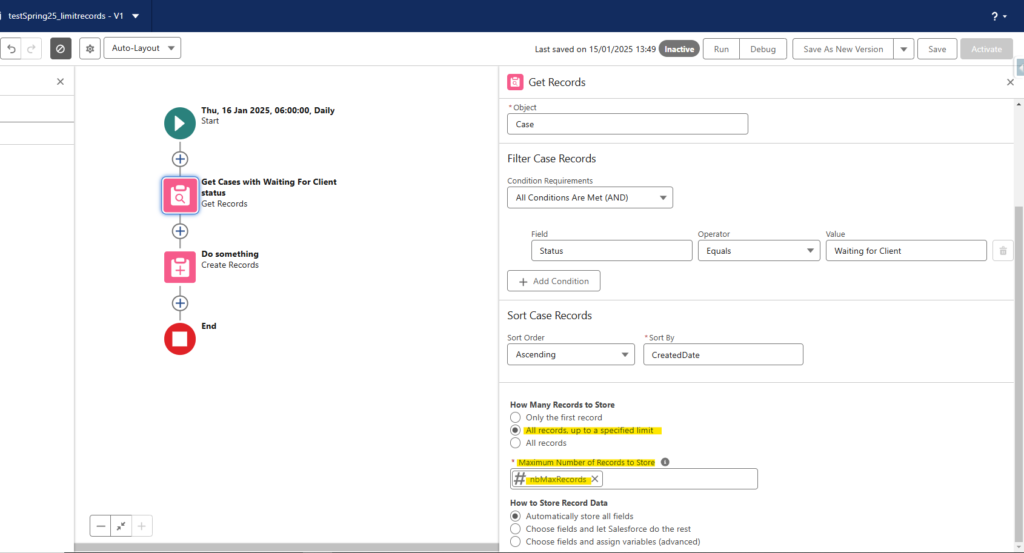
You have probably already faced a flow error message telling you that your scheduled flow was handling too many records. How can we avoid this error by limiting the number of retrieved records, as we would do in SOQL / Apex with a LIMIT ?

Flow error message when handling too many records

It now comes to an end with new Spring’25 Flow enhancement allowing you to define a limit number of records retrieved by a Get Records element.

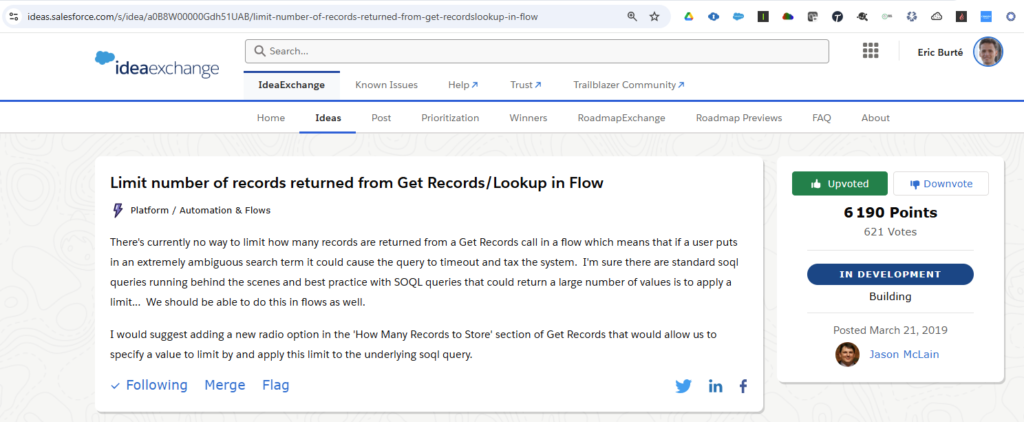
First, an idea was opened 5 years ago to ask for the possibility to add a limit on this Get Record, which is eventually a way to operate a DML operation, as you would have in SOQL with the LIMIT notion.

Here is a screenshot of this idea :

Idea on IdeaExchange at the origin of this feature

Since then, Salesforce’s Spring’25 release update brings now the possibility to specify the number of records to retrieve, in your Get Records elements (from 1 to 20 000 records).

Flow Builder – Get Records details pane – New choice to limit the number of retrieved records

To do so, create a new constant number resources from the resources manager pane in Flow Builder (this way you will define this limit at a variable level) :

How to proceed to leverage this feature – Create a new variable to store the limit number

Thus, you would be able to use this resource in your Get Records element, as described here. You could naturally also define it directly here under, if that is something used only once in the Flow. But, as for now, I would suggest to keep and use the variable.

How to proceed to leverage this feature – Leverage this new variable in your Get Records element

Naturally, some complementary logic (some examples after) may need to be reviewed in your daily scheduled flows, to be sure you do not miss records (to be handled, but whose quantity would be greater than the limit value set) :

  • Create a scheduled job to launch the flow more frequently
  • If you have some date-related conditions in your flow, make sure that your flow is able to handle records from the day before (and not only today’s records as you may see in many scheduled flow samples)
  • In parallel, make sure to have the proper order set up in your Get Records, to handle older records that may have been forgotten from a previous daily execution, accordingly to your requirements. For example, use an ascending (ASC) order to be sure to start by the oldest records.


To read more on the subject :


WINTER’25 – Post Upgrade – Add Conditional Formatting to fields on Dynamic Forms

The Conditional Formatting feature has been progressively deployed in Salesforce instance, as a Christmas gift in advance, after Winter’25 upgrade. The time has now come to discover it, on your Salesforce instance.

To be able to use this feature, you should have migrated your concerned Lightning Page within Dynamic Forms.

In your Lightning Page Builder, click on the field, on which you want to add this visual formatting configuration. In the detail right panel, you will find a new Conditional Formatting section.

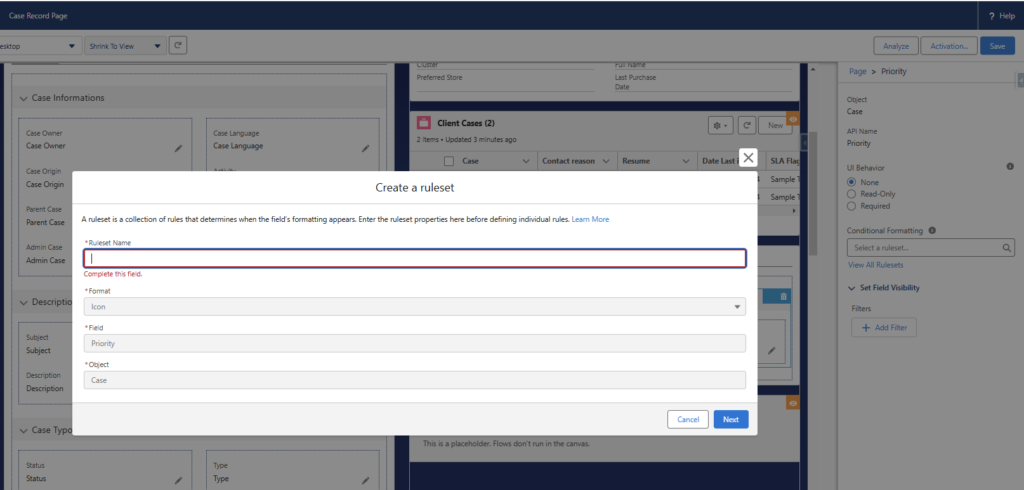
Click in the Component, and either edit the existing ruleset, or add a new ruleset by clicking on the « + Create Ruleset« . See below an example for the Priority field of the Case object.

As for now, you can only define the new ruleset name ; the other filled are grayed out and already filled in. It seems that we will soon be able to format fiels with other possibility than an icon (keep an eye to the roadmap)

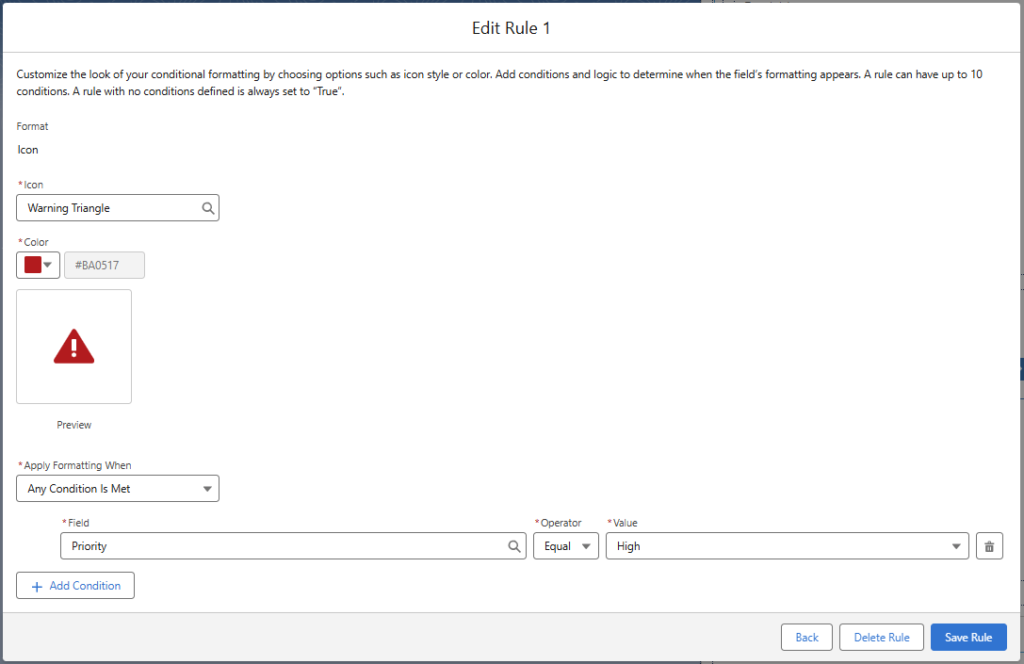
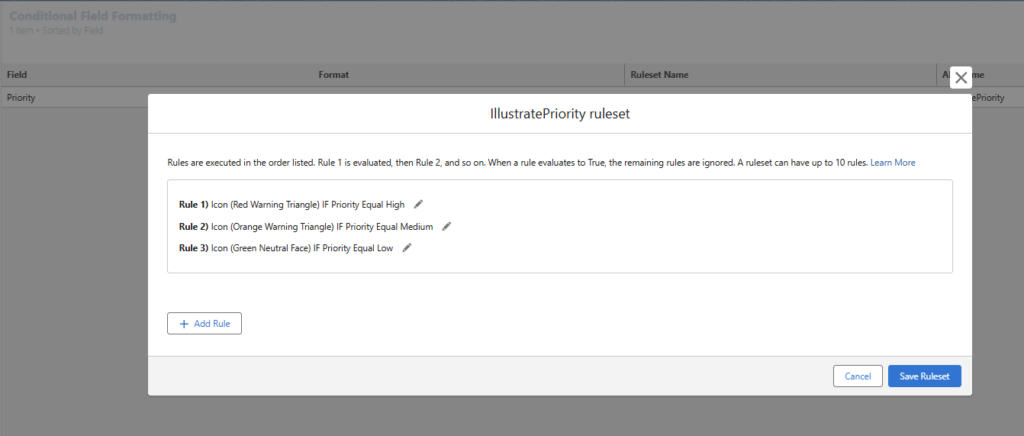
Once the ruleset is created, we are asked to add every possible rules concerning this field. The pieces of information to provide are both a condition, and an icon with a color to use when the field value matches the chosen condition.

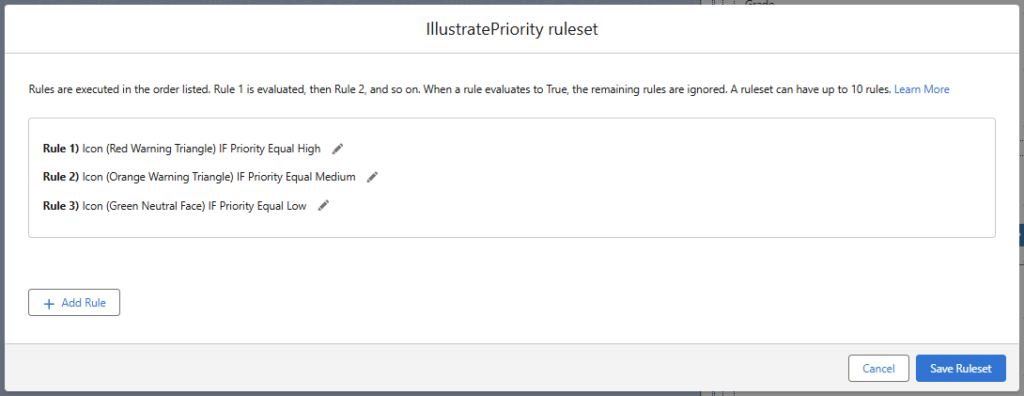
Eventually, the ruleset should include all rules set for this field. It will be displayed this way :

The ruleset configuration is now displayed both on the Lightning Page’s configuration page :

  • on the record field, with an Artist Palette icon next to the field component, indicating that there is a specific formatting applying :
  • and in the detail panel, on the field configuration with the ruleset name mentionned

Testing the ruleset, you will see below how the chosen icons are displayed, accordingly to the picklist field values. Here are some examples for the Case’s Priority field :

It is important to mention that the icon only appears on the Lightning Page. The value of the field is not impacted. You will not get this information in a list view or a report for example !

Remark : You will probably begin to remove soon all formulas, which you have probably set up so far (with a concatenation of an emoji and a field value) to simulate such feature


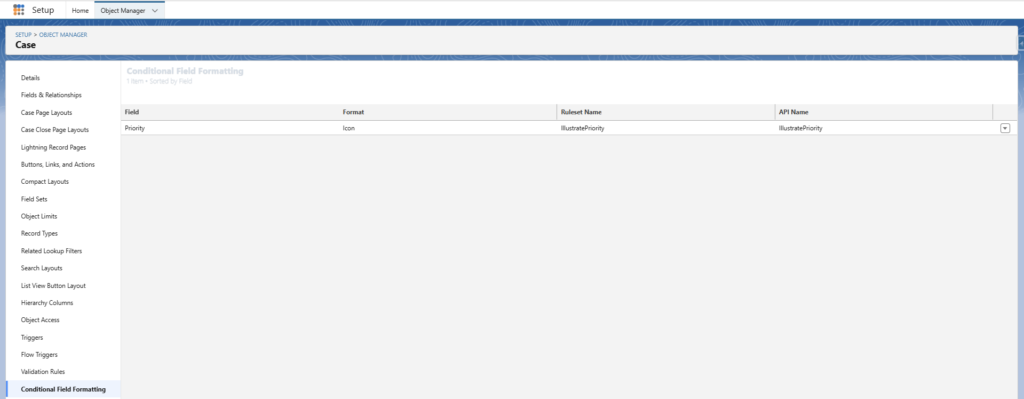
You can also access the Conditional Field formatting information, directly from the concerned object page, in Object Manager, instead of going through every pages.

In our case, when we click on the « Conditional Field Formatting » option in the Case object manager, we see the newly added configuration

We can even edit or delete the ruleset from here.


To read more on the subject :