Salesforce recently came up with an announcement mentioning that they were putting on hold the removal of permissions from profiles, initially planed for Spring’26, due to the fact Salesforce clients are not ready to migrate to a best-in-class « permission sets » model.
So, we may ask : do I need to take care of permissions migration out of Salesforce profiles, if Salesforce paused it ?
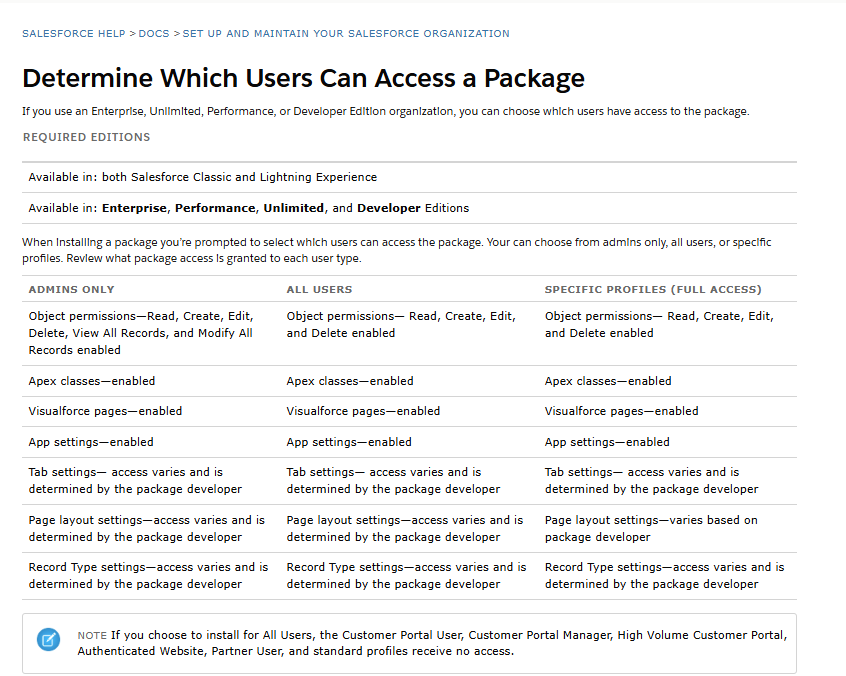
Salesforce mentions that they will keep on supporting the current permission model on profiles, but keeps on encouraging all their clients / integrators to work (for new Salesforce projects) or to migrate (for projects in progress or that are already live) to a more modular and secure permission set–led security model, on a « least privilege » approach.
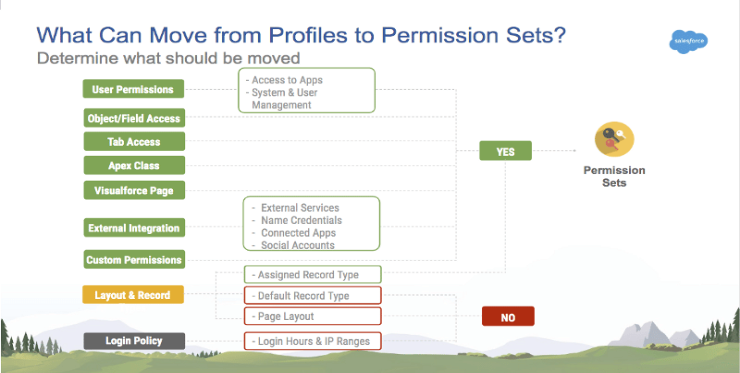
Indeed, you should take advantage of that time to continue migrating your profiles permissions to permission sets (and groups), even if Salesforce paused this removal.
You can start testing the migration to permission sets by transforming your instance profiles, in some huge « profile-oriented » permission sets groups, by using the User Access and Permissions Assistant application, from Salesforce’s App Exchange portal (or one of the applications that are listed below).
| Application / Tool | Type | Price | Document |
| User Access and Permissions Assistant (by Salesforce) | AppExchange | Free | Trailhead Video |
| P2P Profiles to Permission Set Migration Assistant | AppExchange | Free | |
| PackMagix Profile to Permission Set Converter | 3rd Party vendor | Paid | Video |
In a second time, once done, and once you have validated that you have been able to switch to a « basic profile + permission sets (groups) » approach, you would be able to build more « business-oriented » modular permission sets groups, adapted to the way your application is functionally organized (based on scenarios and business features).
In parallel, Salesforce keeps on investing in enhancements about
- Improved User management experience in Setup
- Permission Sets and Permission Set Groups management, and summary views
To read more on the subject
- Help Article – Permissions in Profiles Retirement Cancelled : https://help.salesforce.com/s/articleView?id=003834041&type=1
- Help Article – Guidelines for Creating Permission Sets and Permission Set Groups : https://help.salesforce.com/s/articleView?id=platform.perm_sets_best_practices.htm&type=5
- Help Article – Migrate from Profiles to Permission Sets : https://help.salesforce.com/s/articleView?id=platform.migrate_profiles.htm&type=5
- Help Article – Convert a Profile to a Permission Set : https://help.salesforce.com/s/articleView?id=platform.perm_uapa_convert_profile_to_a_permission_set.htm&type=5
- AppExchange – User Access and Permissions Assistant : https://appexchange.salesforce.com/appxListingDetail?listingId=a0N3A00000FeF99UAF