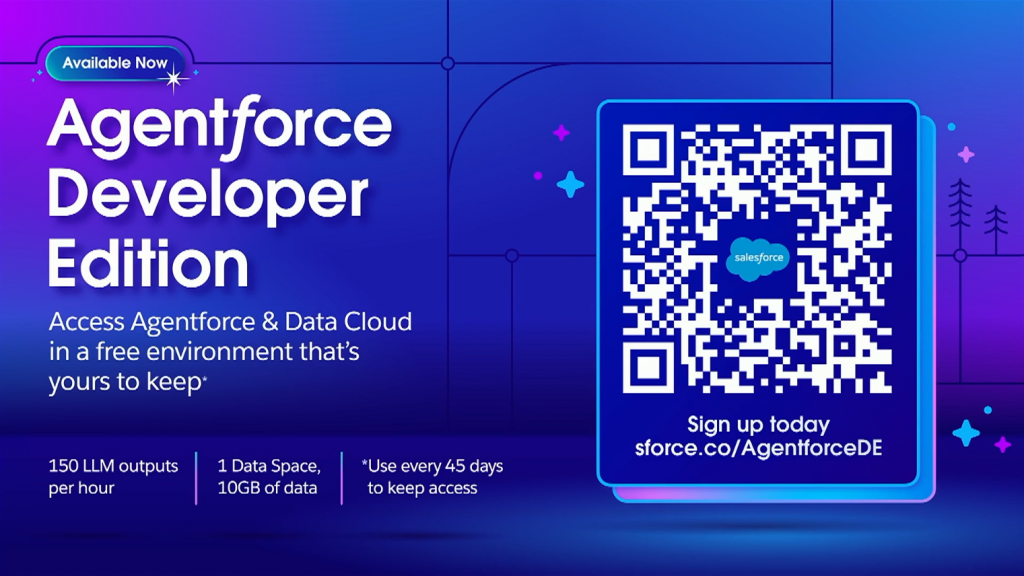
One of big announcement of Salesforce TDX 2025 is the possibility to provision a developer edition with all Agentforce related features available in it. We will show how to provision it.
And great precision – compared to former Agentforce / Data Cloud playgrounds with which you may have played for your Trailhead modules so far – this Agentforce-fueled Dev Edition is available as long as your regularly use it (one login every 45 days !).
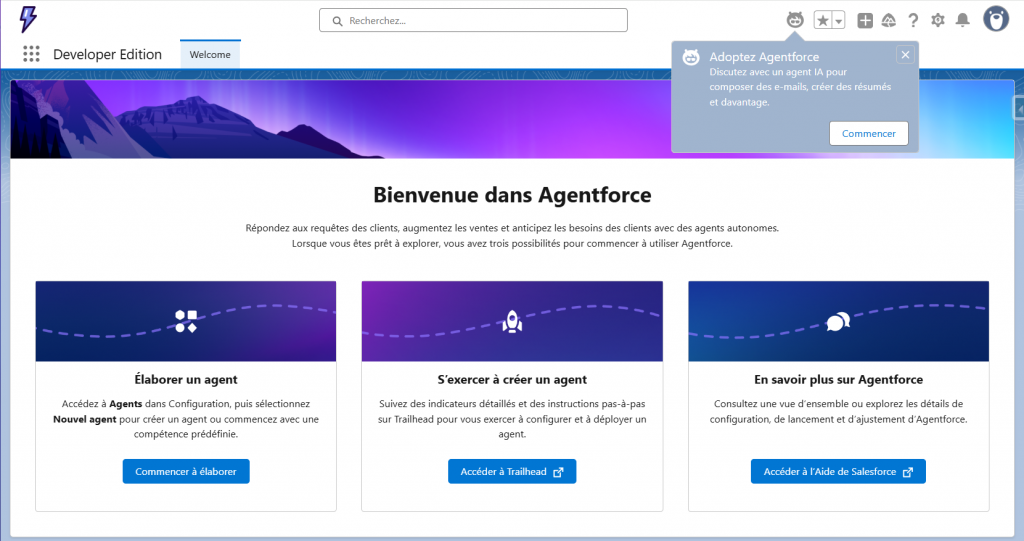
The QR Code to flash to get your own AI-fueled personal Dev EditionAgentforce Dev Edition home page
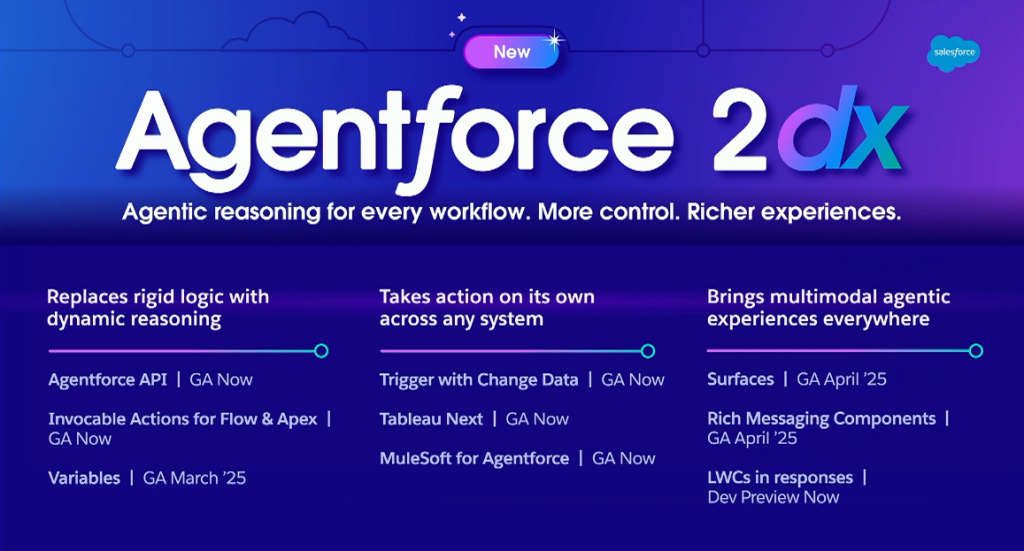
For information, other news about Headless / Agentforce API have been shared during this session ; Agentforce is not only used by an human
New features related to Agentforce, centered on enhancing the interaction with the platform
This communication echoes some previous materials shared by Salesforce teams, like the two following ones, available in Youtube, on Salesforce Developers‘ account, published a couple of weeks, before TDX’25 event :
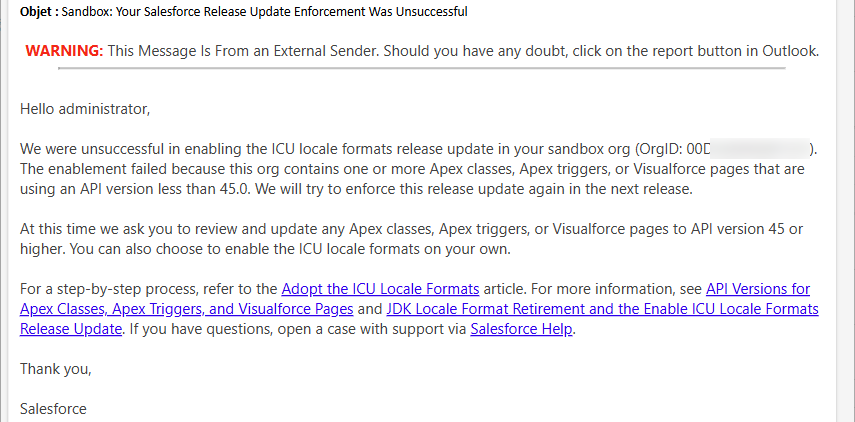
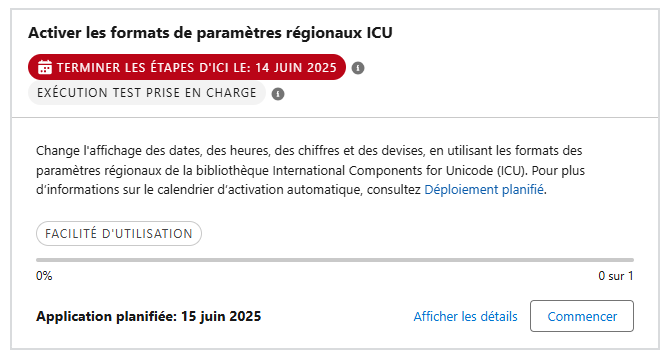
Maybe, have you received this communication from Salesforce after Spring’25 release update, either for your Production instance, or your non-preview sandboxes :
ICU activation failed – Do not worry..! Prepare for Summer’25 next slot
For Salesforce Spring’25 release update, ICU locale format was planned to be activated. I will explain how to prepare your Salesforce org for upcoming ICU format release update for Summer’25 if you have missed Spring’25 activation ?
But indeed, as mentioned in the documentations from Salesforce, you will find under this article, this upgrade from JDK previous format, towards ICU international format, was only possible if all technical (Apex, Visualforce, and Lightning) components of the platform were compliant (above API 45.0 version). If your Salesforce instance contains lower API versions of these components, Salesforce won’t enable ICU locale formats in your org, and indeed you should have received this email.
If ever you are concerned by the unsuccessful upgrade, and you received this email, please do not worry, and read the following article. There will be another ICU format activation slot, linked to next Summer’25 release upgrade (June 2025).
Introduction : What’s behind ICU Format ?
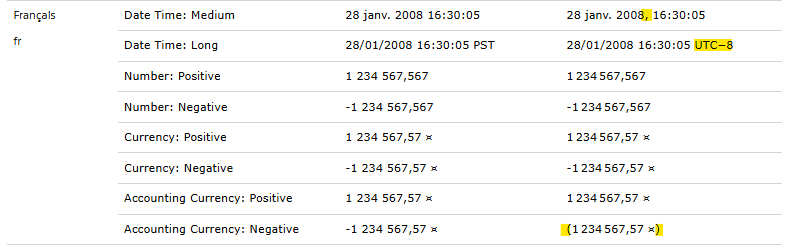
As an introduction, just to know what is behind the ICU letters, in this help article, Salesforce details the impacted locales / users, and the differences between both JDK and ICU formats for these locales :
A very straight-forward Action Plan, within just a few steps !
Assessment of your useR locales : Who will be impacted by ICU Update
From a pragmatic point of view, you need to tackle all technical actions, listed by Salesforce, to make sure the upgrade could pass next time. I suggest that you follow the procedure & query detailed by Salesforce in their exhaustive documentation (see below). You will find below a short version of it based on the actions I have followed on the instances I handle.
First, query your org to see your impacted users, and their locale. For information, Canada (en_CA locale) requires a specific activation to handle separately.
SELECT toLabel(LocaleSidKey) LocaleName, LocaleSidKey, Count(id) UserCount
FROM User where IsActive=true GROUP BY LocaleSidKey
ORDER BY Count(id) desc
You would be then able to visualize the way your date / values informations will be displayed (important, especially if you have some text manipulation of those data types).
Enable the ICU feature on a sandbox first
Go to Setup > Release updates, look for the ICU release update, click Get Started, and enable it. Do it first in a sandbox, and test that it does not generate regression errors in this sandbox ! Then apply on other sandboxes, testing instances and after that in Production.
Identify technical components to update to stick with ICU Release Update
As written above, if your instance contains technical components (Apex classes, apex triggers, Visualforce pages or components, Lightning components, managed packages), Salesforce asks you to upgrade their API version.
Always use as a target the Production version (target v62.0 for example, even when Preview sandboxes are in v.63.0 version) to prevent you from being blocked when deploying your updated components in Production.
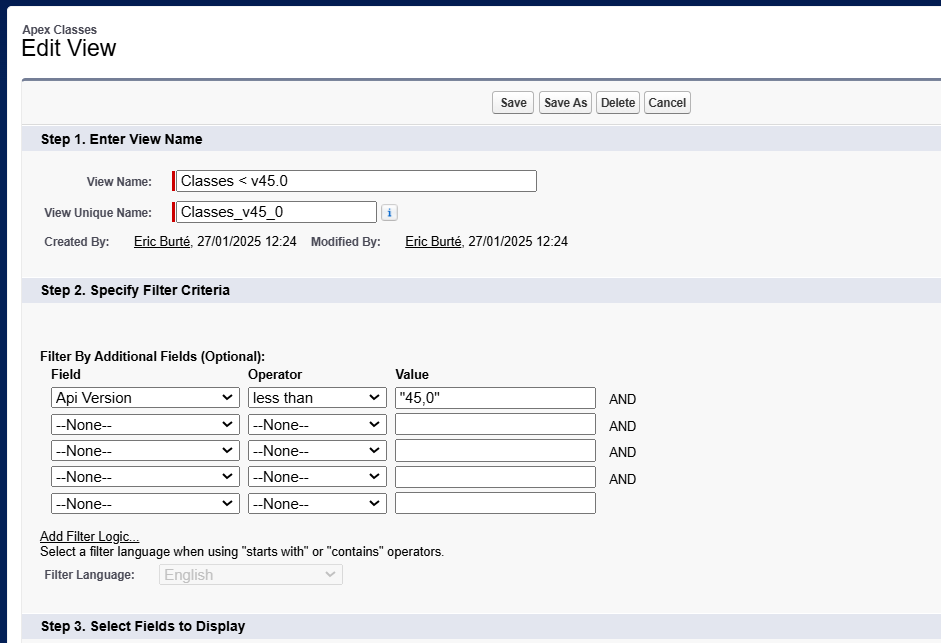
To identify them, you may either leverage SOQL query on concerned Salesforce technical objects, or use a dedicated list view on each of these component types in Setup pages.
a « Classes < v45.0 » view, for Apex classes (see the example below)
a « Triggers < v45.0 » view, for Apex triggers
a « VFP < v45.0 » view, for Visualforce pages
a « VFC < v45.0 » view, for Visualforce components
a « LWC < v45.0 » view, for Lightning components (Aura and LWC)
You may also query your instance (on ApexClass, ApexTrigger, ApexPage and ApexComponents objects) with Salesforce Inspector Reloaded, if more convenient for you.
SELECT Id, Name, ApiVersion, IsValid, NamespacePrefix
FROM ApexClass
WHERE ApiVersion < 45
ORDER BY ApiVersion DESC
Upgrade your code to a version compliant with ICU format
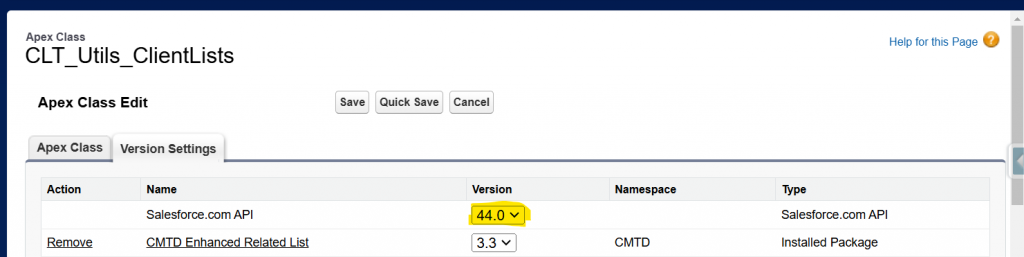
As written above, navigate through Setup, select the concerned components (for example « Apex Classes » for Apex classes) setup page, click on the metadata to update, Edit, access the « Salesforce.com API » version line, and update to target version.
Class version in v44.0..just changed in a click to v62.0 (you can also open them in Dev Console if more convenient to do it)
If the component is compliant, the class will be updated within the correct version. Otherwise, you will be warned when saving, that there is an error in it, as you are when you are coding / saving in Dev Console / VS Code.
In this case, some changes would need to be undertaken while updating the code version of your components. For example, in API 59.0 version, the getSalesforceBaseUrl() method has been deprecated. So if your code includes a call to this method, you have 2 options :
update this class to the latest / more recent compliant API version, where the method was available (v58.0 in this case) ; that could go faster for this time, but that is something that will need to be addressed sooner or later..
take advantage of this overall « platform-related action plan », to include some refactoring technical actions / tickets to update the code (here, in this example, replace the method by a call to getOrgDomainUrl() available since v59.0)
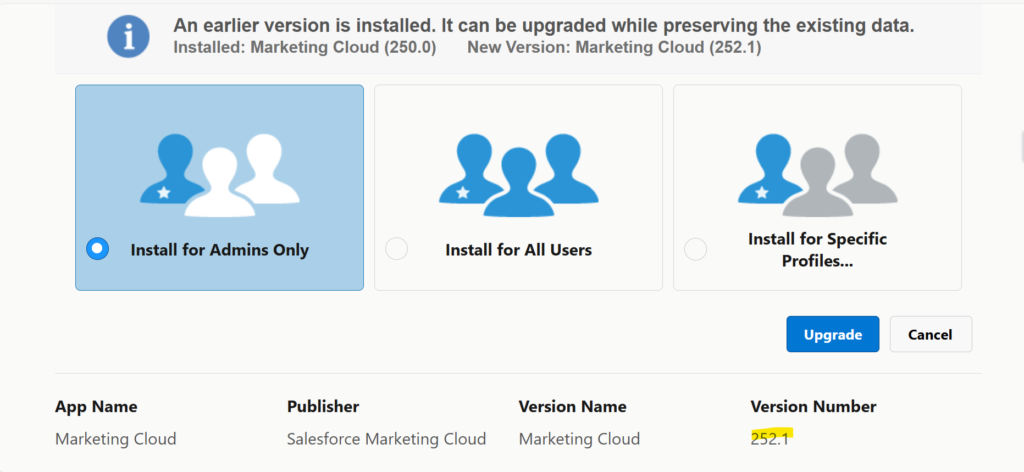
Update your packages
Update the unmanaged code to the latest Apex version, as you have done previously
Update your managed packages (through AppExchange updates)
If you use Salesforce related packages (Marketing Engagement / Pardot, Marketing Cloud Connector), Salesforce should enable this kind of features with their automatic release updates. As an admin, you still can update the package if nothing is available.
If you use 3rd-party-vendor’s managed packages (for CTI, for Org assessment, or for any feature improvement scenarios), you would necessarily need to look for package updates on AppExchange, or on the asset homepage / repository. Do not hesitate to contact the editor company if there is no update available.
Deployment in UAT for Non Regression testing, before Production
Deploy these technical elements before activation, in UAT for non-regression tests
Code to be deployed / updated first
Managed packages to be updated after, accordingly to the action plan you have set up for your test sandbox.
Once done and tested, deploy into Production, as soon as the tests on UAT are successful, and you will be ready for next ICU activation slot !
PS : If you have many teams working / deploying on Salesforce, do not forget to let them know about this action plan. They will need to be consistent concerning both coding / deployment / testing actions
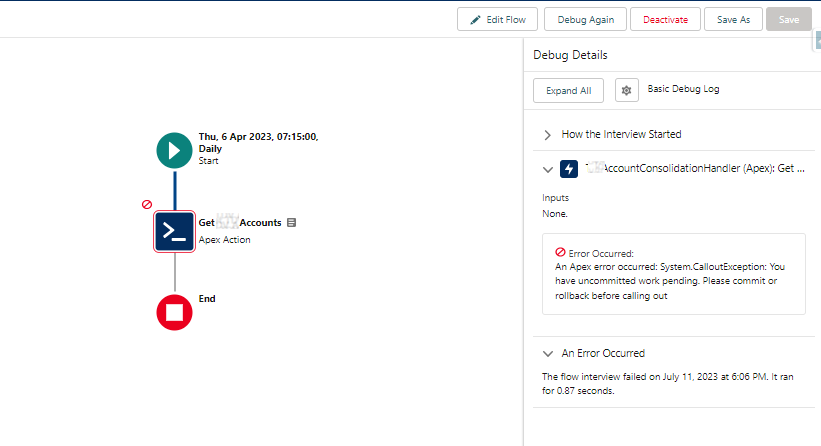
I built, some time ago, a very simple scheduled flow that only called an invocable method, calling itself an external virtualization system, to retrieve accounts from it, and to copy them back in Salesforce.
When I ran it, in debug mode (Debug > Run), the flow was failing with a strange « Callout exception » due to pending in-progress work ! (cf picture below)
CallOut – Exception message
But when I call (in anonymous action) directly the method called by the action, it works fine !
What happens is that there were some DML operations in progress, when the scheduled flow was fired, meaning that some accounts records were not in a stable saved state.
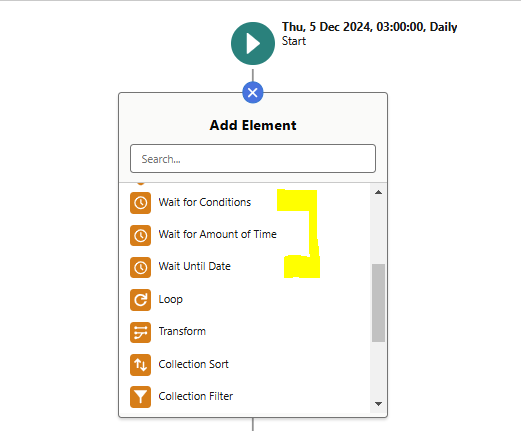
In this case, you can naturally try to reorganize your code and flows to make sure there will be no element interfering with your DML. But, in case of a refactoring complexity, or short timing, if you ever face this case, to commit the in-progress transactions, you could use :
a Screen element (on a screen flow)
or a Pause element (on a scheduled flow) : reaching a Pause element ends the current transaction. When the flow resumes after the pause, the Get Records does not face anymore the « pending uncommitted work » exception.
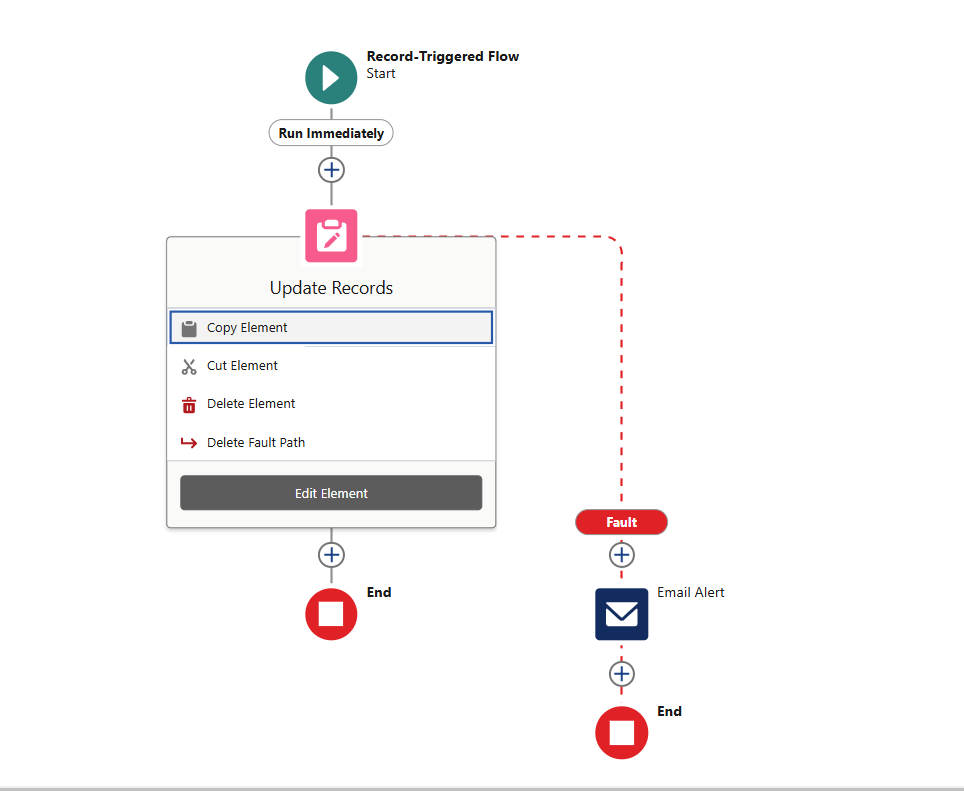
Eventually, since then, you also now have the possibility to catch errors in flows with error-sensitive Fault Paths. To do so, select the DML-related element, and create the Fault Path from it. You can delete the Fault Path from the same place.
If you were used to develop, and never jumped to VS Code installation on your workstation, you can now access Code Builder, with a much more professional user experience than Dev Console.
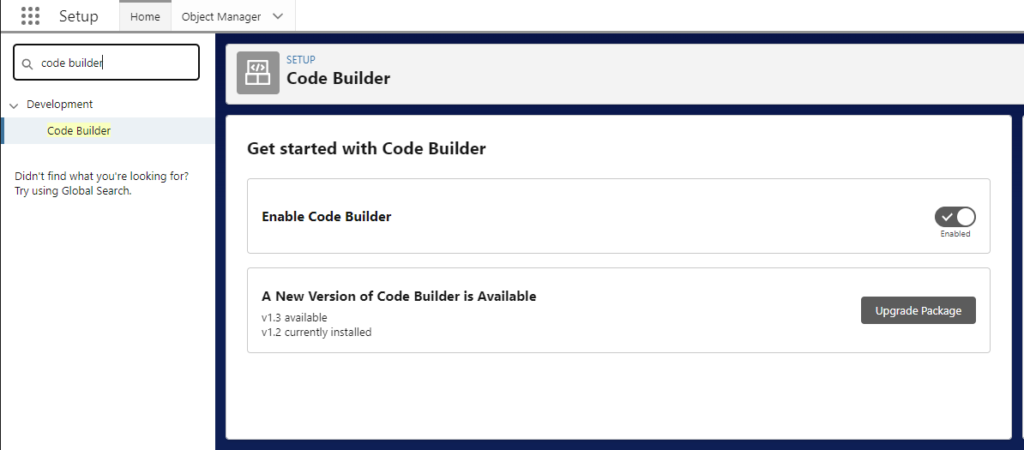
Follow this step-by-step guide to enable Code Builder, directly in your Salesforce Org.
You will need to enable from within your Production instance, but would be naturally able to work since then in your developer sandboxes. It will require a production license for each developer needing to use Code Builder, but does not need to be a full Salesforce business license.
Setup – Code Builder – Enable Code Builder
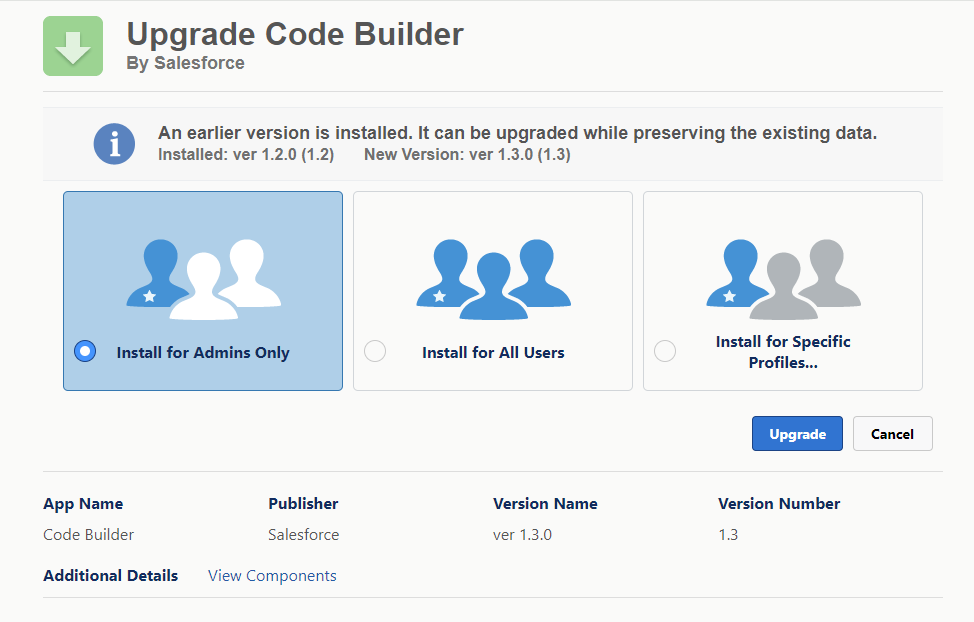
A new package version has been available since early May
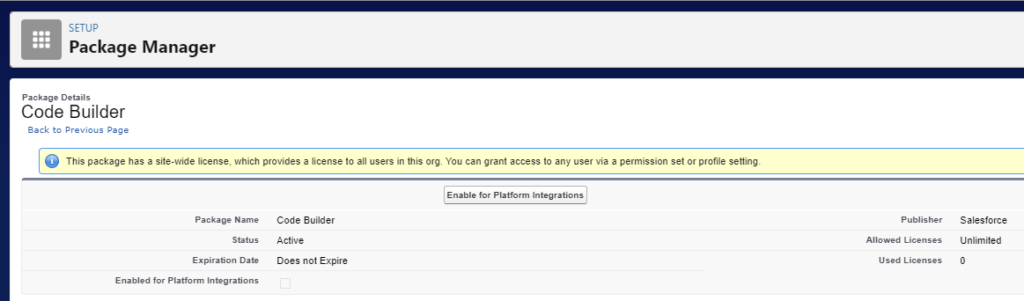
The package is then available in Setup > Installed Packages
You can then either enable the Code Builder license to the Platform Integration license,
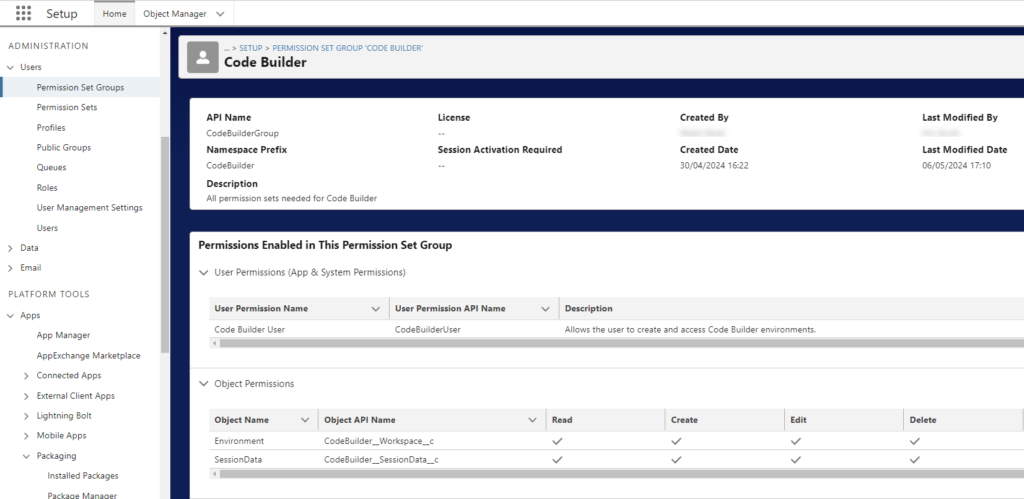
or manually assign the related permission set group to the concerned users
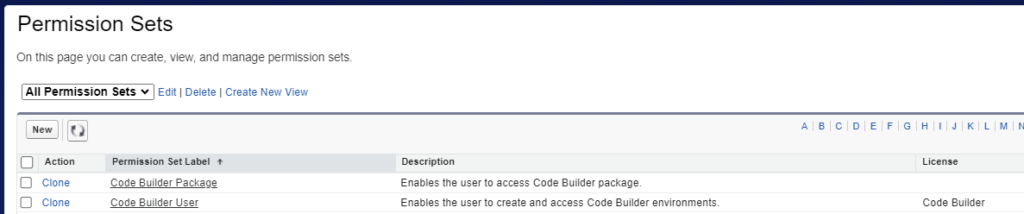
Remark : you would see the following permission sets when going through the related detailed permission sets
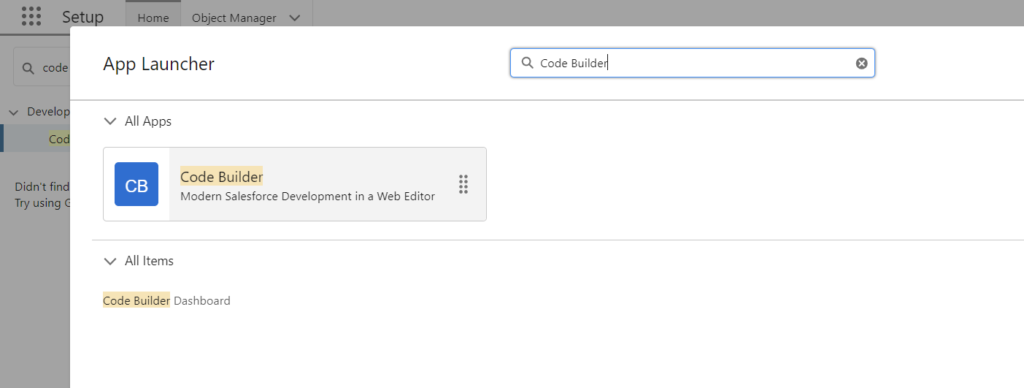
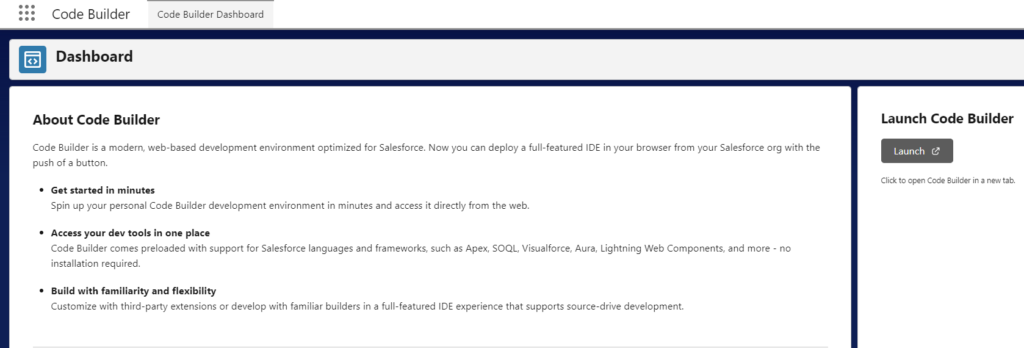
To Launch Code Builder, go to App Launcher
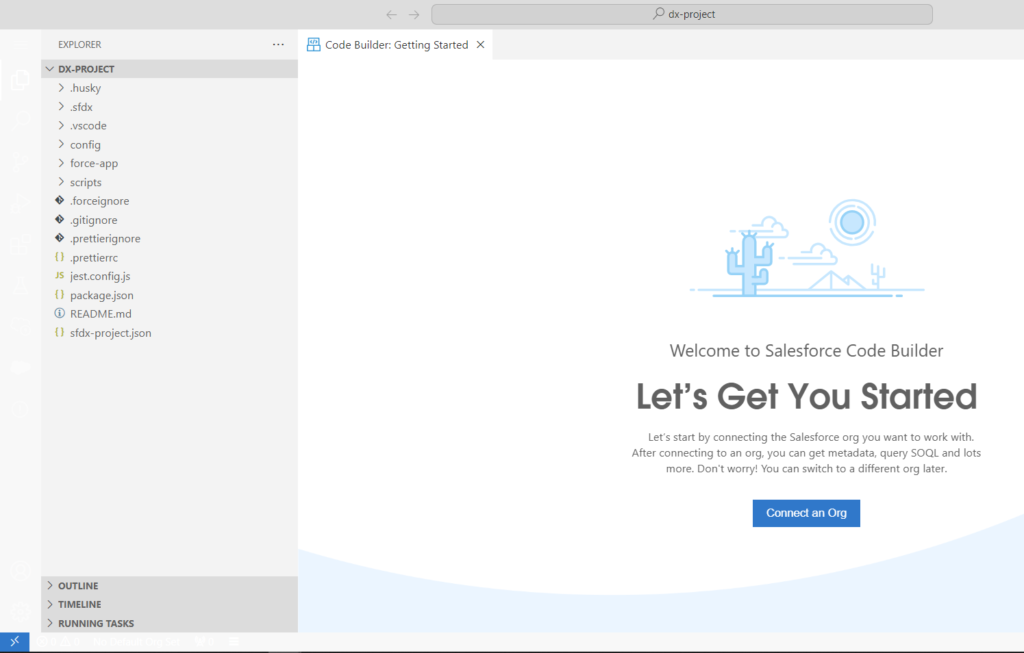
Code Builder instance is then loading in the browser, with an URL address looking like: https://nameoftheinstance-name.fra.001.sf.code-builder.platform.salesforce.com/?folder=/home/codebuilder/dx-project
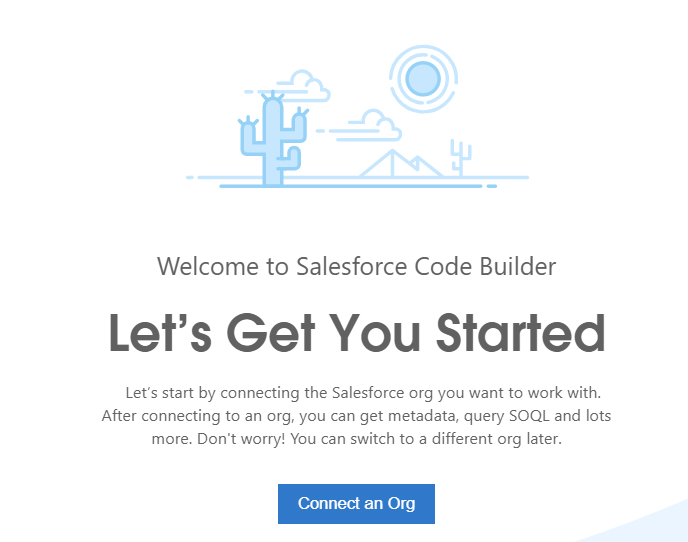
After loading you will see a screen that will ring a bell :
Let’s connect the instance on which you will work (sandboxes) as you would do with your VS Code’s Command Palette
To do so, please follow the following instructions :
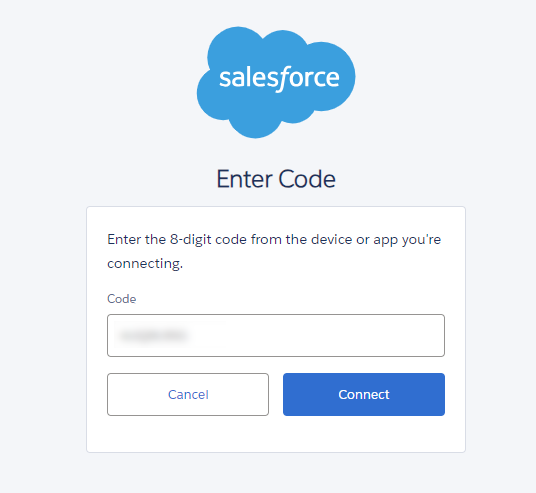
Click on Connect an Org button from previous screen. Then, in the displayed popup, select the kind of sandbox to connect to, as you can do, with VS Code’s Command Palette
Enter an alias to easily determine the instance
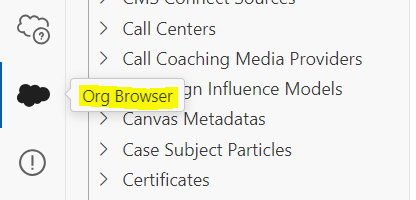
Once the window is loaded (could take a while), please click on the cloud icon, in order to open the Org Browser.
When you choose Open the Org Browser, all the configured instance metadata is retrieved and displayed in your local project under the root directory.
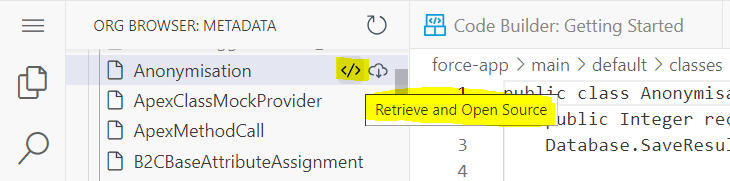
Then to access detailed configuration, choose the metadata in the left panel, and choose to Retrieve and Open Source
Now you can modify and push your code, from CodeBuilder, to your developer sandbox. As in VS Code, be always aware on the sandbox / instance, which your Code Builder is connected to.