Salesforce recently came up with an announcement mentioning that they were putting on hold the removal of permissions from profiles, initially planed for Spring’26, due to the fact Salesforce clients are not ready to migrate to a best-in-class « permission sets » model.
So, we may ask : do I need to take care of permissions migration out of Salesforce profiles, if Salesforce paused it ?
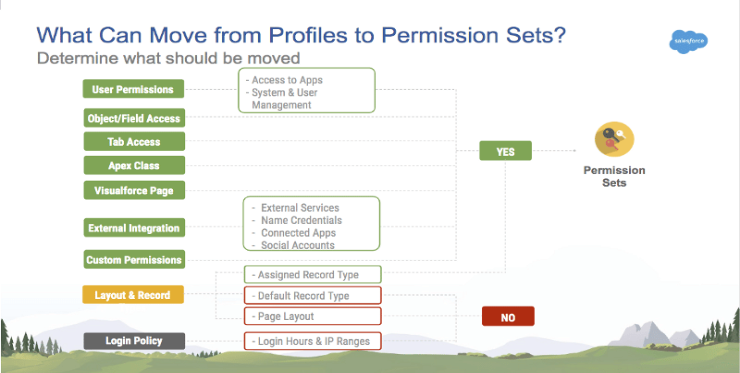
Salesforce mentions that they will keep on supporting the current permission model on profiles, but keeps on encouraging all their clients / integrators to work (for new Salesforce projects) or to migrate (for projects in progress or that are already live) to a more modular and secure permission set–led security model, on a « least privilege » approach.
Source Salesforce – What can move from Profiles to Permission Sets ?
Indeed, you should take advantage of that time to continue migrating your profiles permissions to permission sets (and groups), even if Salesforce paused this removal.
You can start testing the migration to permission sets by transforming your instance profiles, in some huge « profile-oriented » permission sets groups, by using the User Access and Permissions Assistant application, from Salesforce’s App Exchange portal (or one of the applications that are listed below).
Application / Tool
Type
Price
Document
User Access and Permissions Assistant (by Salesforce)
In a second time, once done, and once you have validated that you have been able to switch to a « basic profile + permission sets (groups) » approach, you would be able to build more « business-oriented » modular permission sets groups, adapted to the way your application is functionally organized (based on scenarios and business features).
In parallel, Salesforce keeps on investing in enhancements about
Improved User management experience in Setup
Permission Sets and Permission Set Groups management, and summary views
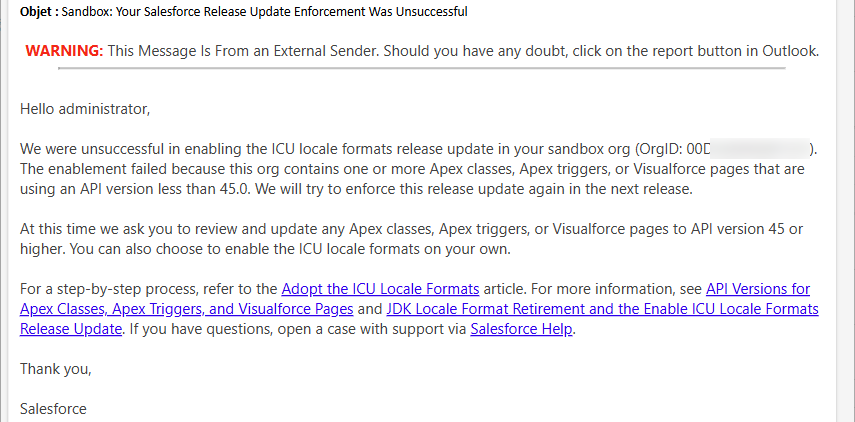
Maybe, have you received this communication from Salesforce after Spring’25 release update, either for your Production instance, or your non-preview sandboxes :
ICU activation failed – Do not worry..! Prepare for Summer’25 next slot
For Salesforce Spring’25 release update, ICU locale format was planned to be activated. I will explain how to prepare your Salesforce org for upcoming ICU format release update for Summer’25 if you have missed Spring’25 activation ?
But indeed, as mentioned in the documentations from Salesforce, you will find under this article, this upgrade from JDK previous format, towards ICU international format, was only possible if all technical (Apex, Visualforce, and Lightning) components of the platform were compliant (above API 45.0 version). If your Salesforce instance contains lower API versions of these components, Salesforce won’t enable ICU locale formats in your org, and indeed you should have received this email.
If ever you are concerned by the unsuccessful upgrade, and you received this email, please do not worry, and read the following article. There will be another ICU format activation slot, linked to next Summer’25 release upgrade (June 2025).
Introduction : What’s behind ICU Format ?
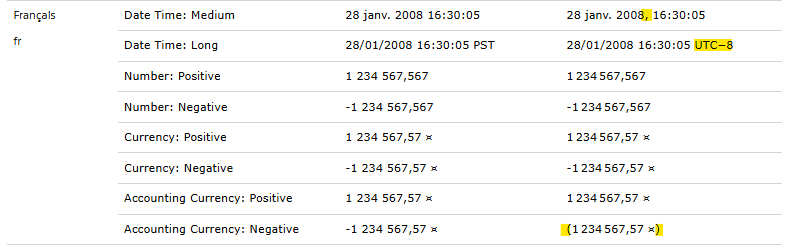
As an introduction, just to know what is behind the ICU letters, in this help article, Salesforce details the impacted locales / users, and the differences between both JDK and ICU formats for these locales :
A very straight-forward Action Plan, within just a few steps !
Assessment of your useR locales : Who will be impacted by ICU Update
From a pragmatic point of view, you need to tackle all technical actions, listed by Salesforce, to make sure the upgrade could pass next time. I suggest that you follow the procedure & query detailed by Salesforce in their exhaustive documentation (see below). You will find below a short version of it based on the actions I have followed on the instances I handle.
First, query your org to see your impacted users, and their locale. For information, Canada (en_CA locale) requires a specific activation to handle separately.
SELECT toLabel(LocaleSidKey) LocaleName, LocaleSidKey, Count(id) UserCount
FROM User where IsActive=true GROUP BY LocaleSidKey
ORDER BY Count(id) desc
You would be then able to visualize the way your date / values informations will be displayed (important, especially if you have some text manipulation of those data types).
Enable the ICU feature on a sandbox first
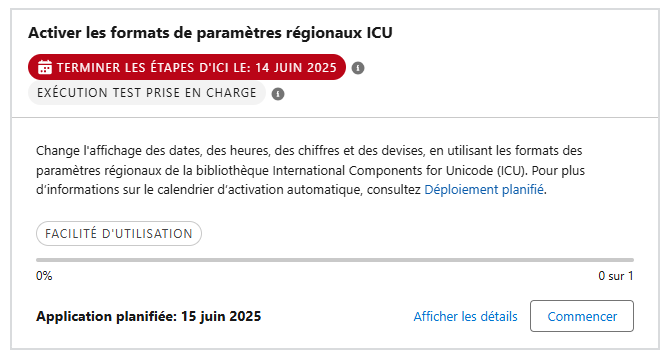
Go to Setup > Release updates, look for the ICU release update, click Get Started, and enable it. Do it first in a sandbox, and test that it does not generate regression errors in this sandbox ! Then apply on other sandboxes, testing instances and after that in Production.
Identify technical components to update to stick with ICU Release Update
As written above, if your instance contains technical components (Apex classes, apex triggers, Visualforce pages or components, Lightning components, managed packages), Salesforce asks you to upgrade their API version.
Always use as a target the Production version (target v62.0 for example, even when Preview sandboxes are in v.63.0 version) to prevent you from being blocked when deploying your updated components in Production.
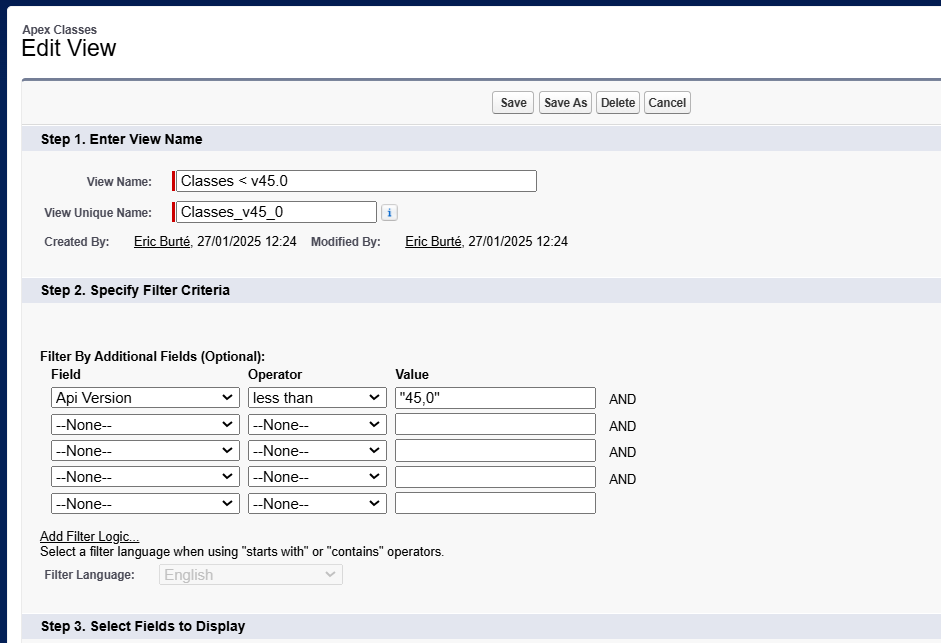
To identify them, you may either leverage SOQL query on concerned Salesforce technical objects, or use a dedicated list view on each of these component types in Setup pages.
a « Classes < v45.0 » view, for Apex classes (see the example below)
a « Triggers < v45.0 » view, for Apex triggers
a « VFP < v45.0 » view, for Visualforce pages
a « VFC < v45.0 » view, for Visualforce components
a « LWC < v45.0 » view, for Lightning components (Aura and LWC)
You may also query your instance (on ApexClass, ApexTrigger, ApexPage and ApexComponents objects) with Salesforce Inspector Reloaded, if more convenient for you.
SELECT Id, Name, ApiVersion, IsValid, NamespacePrefix
FROM ApexClass
WHERE ApiVersion < 45
ORDER BY ApiVersion DESC
Upgrade your code to a version compliant with ICU format
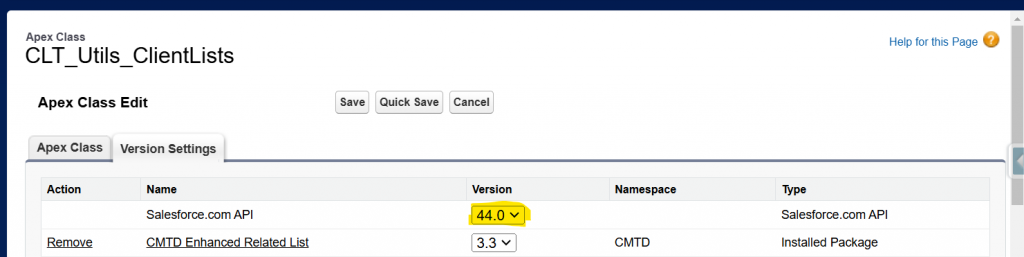
As written above, navigate through Setup, select the concerned components (for example « Apex Classes » for Apex classes) setup page, click on the metadata to update, Edit, access the « Salesforce.com API » version line, and update to target version.
Class version in v44.0..just changed in a click to v62.0 (you can also open them in Dev Console if more convenient to do it)
If the component is compliant, the class will be updated within the correct version. Otherwise, you will be warned when saving, that there is an error in it, as you are when you are coding / saving in Dev Console / VS Code.
In this case, some changes would need to be undertaken while updating the code version of your components. For example, in API 59.0 version, the getSalesforceBaseUrl() method has been deprecated. So if your code includes a call to this method, you have 2 options :
update this class to the latest / more recent compliant API version, where the method was available (v58.0 in this case) ; that could go faster for this time, but that is something that will need to be addressed sooner or later..
take advantage of this overall « platform-related action plan », to include some refactoring technical actions / tickets to update the code (here, in this example, replace the method by a call to getOrgDomainUrl() available since v59.0)
Update your packages
Update the unmanaged code to the latest Apex version, as you have done previously
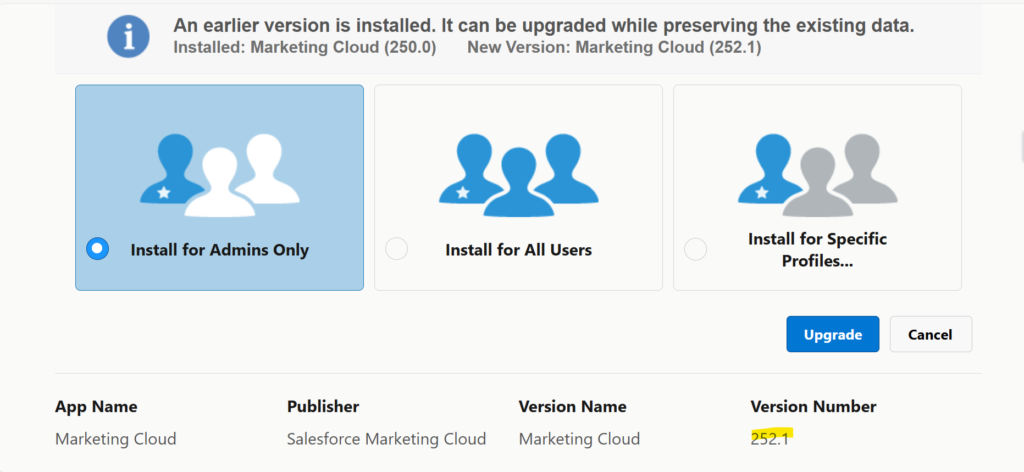
Update your managed packages (through AppExchange updates)
If you use Salesforce related packages (Marketing Engagement / Pardot, Marketing Cloud Connector), Salesforce should enable this kind of features with their automatic release updates. As an admin, you still can update the package if nothing is available.
If you use 3rd-party-vendor’s managed packages (for CTI, for Org assessment, or for any feature improvement scenarios), you would necessarily need to look for package updates on AppExchange, or on the asset homepage / repository. Do not hesitate to contact the editor company if there is no update available.
Deployment in UAT for Non Regression testing, before Production
Deploy these technical elements before activation, in UAT for non-regression tests
Code to be deployed / updated first
Managed packages to be updated after, accordingly to the action plan you have set up for your test sandbox.
Once done and tested, deploy into Production, as soon as the tests on UAT are successful, and you will be ready for next ICU activation slot !
PS : If you have many teams working / deploying on Salesforce, do not forget to let them know about this action plan. They will need to be consistent concerning both coding / deployment / testing actions
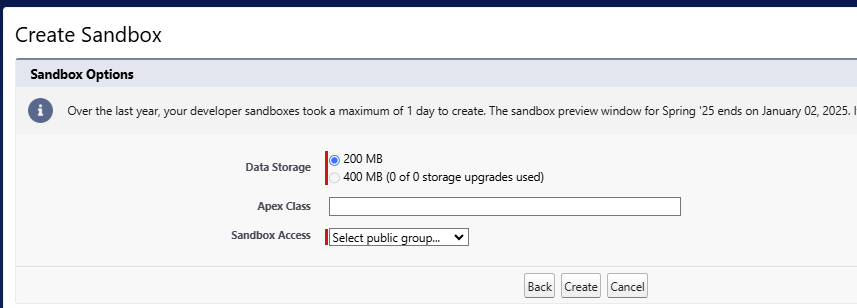
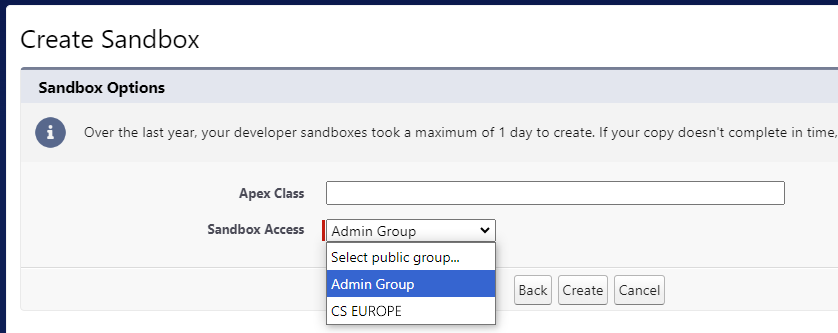
When you created a Salesforce Sandbox, the user creating the new sandbox was kept active to be able to login in this new sandbox, but all the other ones were created inactive.
Now, since the last release, you can choose to keep active, all the users of a Public Group, by example an Admin / Tech Lead active group, or for release deployment user, that may be granted access on all sandboxes.
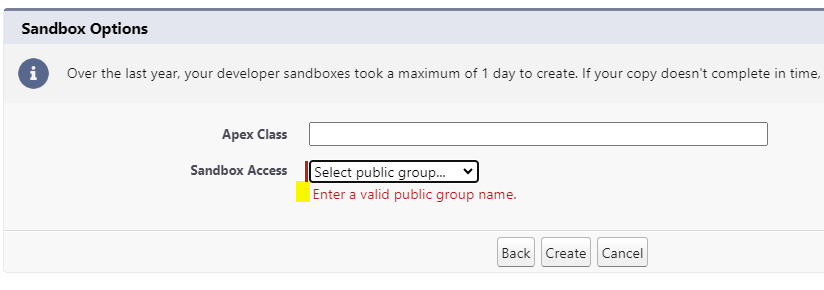
You are required to select a public group. That means you need to configure such Public Group to be able to go beyond this screen. As it is an one-off operation, that is something you can configure up front, and review when needed when resources leave or arrive.
As you can see on the screen, the group is mandatory. Otherwise, it will generate an error asking you to enter a valid group name
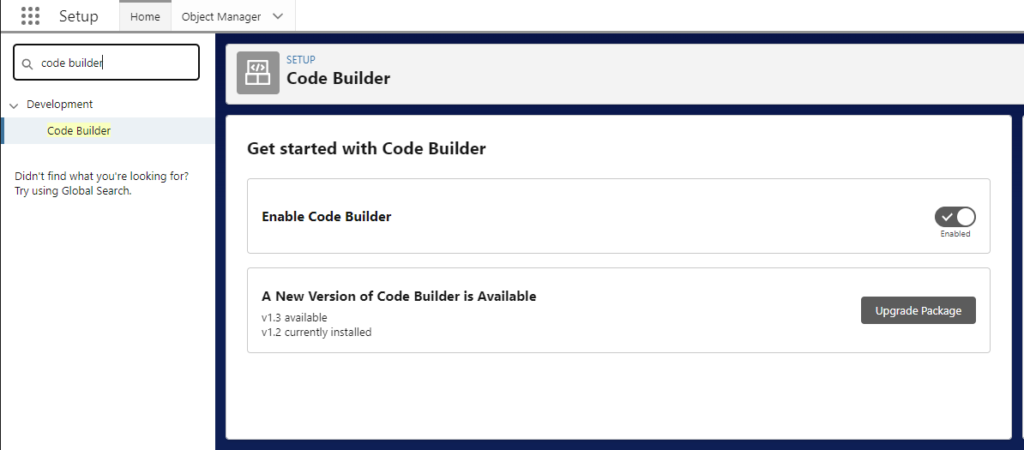
If you were used to develop, and never jumped to VS Code installation on your workstation, you can now access Code Builder, with a much more professional user experience than Dev Console.
Follow this step-by-step guide to enable Code Builder, directly in your Salesforce Org.
You will need to enable from within your Production instance, but would be naturally able to work since then in your developer sandboxes. It will require a production license for each developer needing to use Code Builder, but does not need to be a full Salesforce business license.
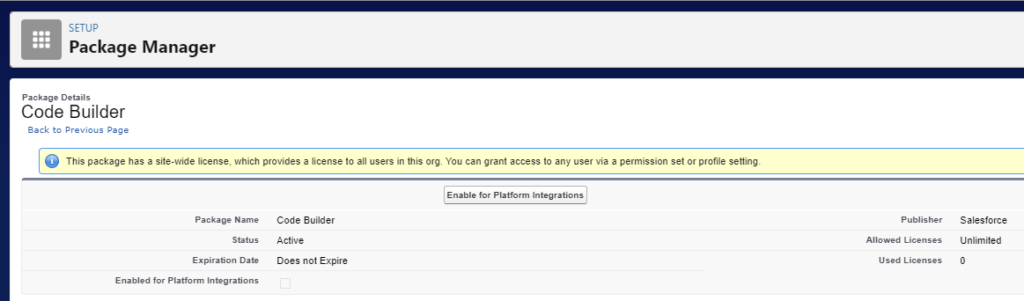
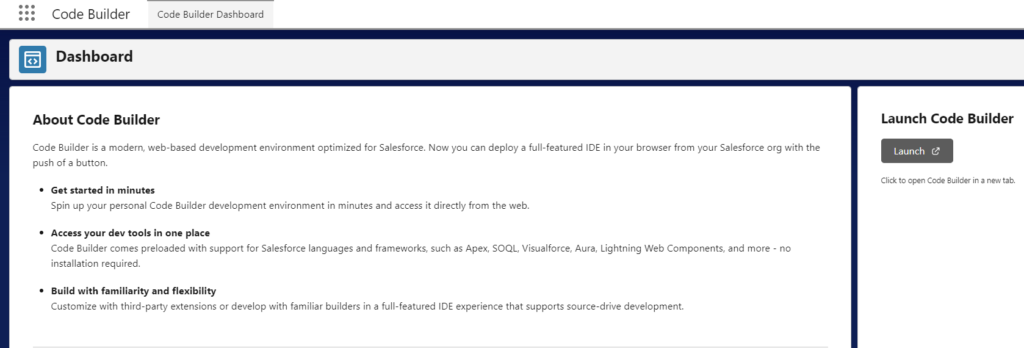
Setup – Code Builder – Enable Code Builder
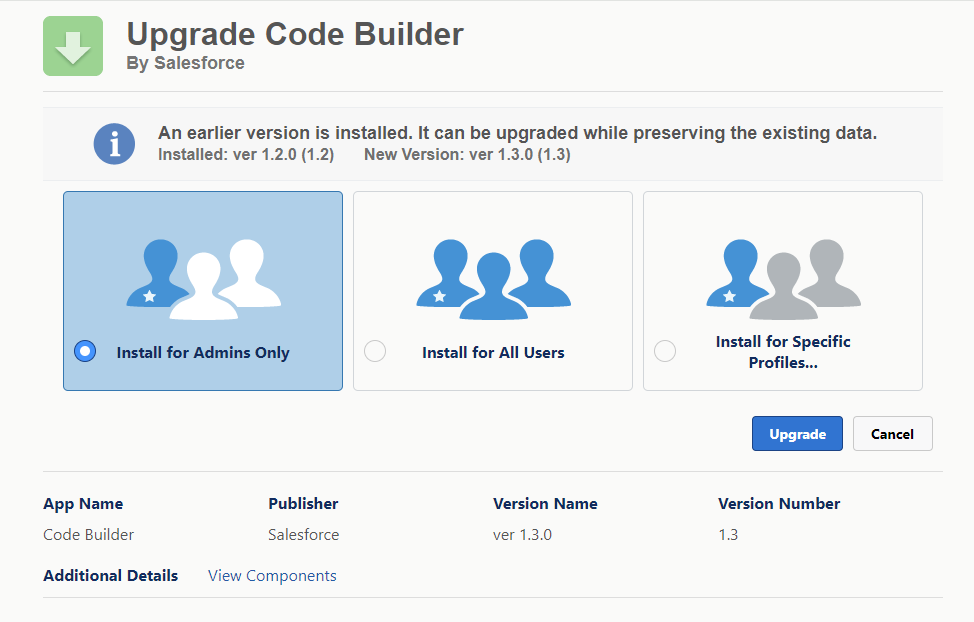
A new package version has been available since early May
The package is then available in Setup > Installed Packages
You can then either enable the Code Builder license to the Platform Integration license,
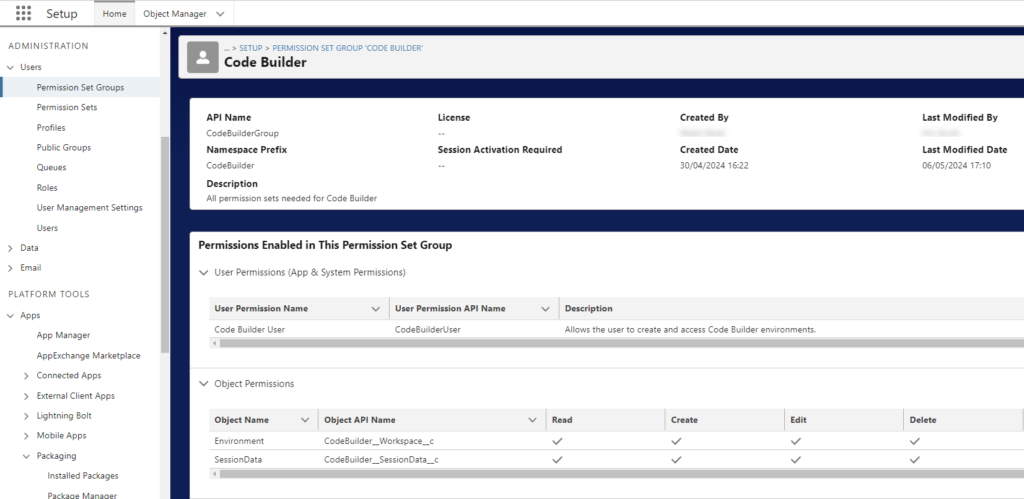
or manually assign the related permission set group to the concerned users
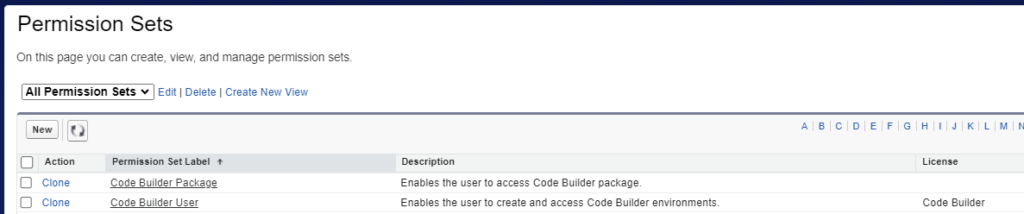
Remark : you would see the following permission sets when going through the related detailed permission sets
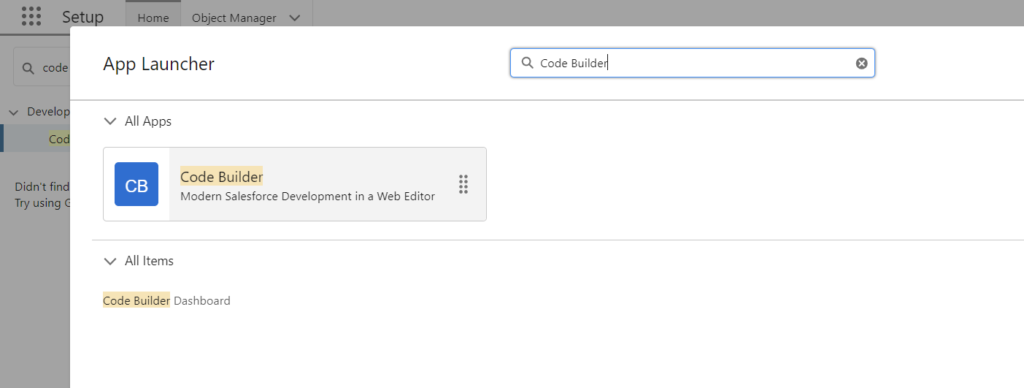
To Launch Code Builder, go to App Launcher
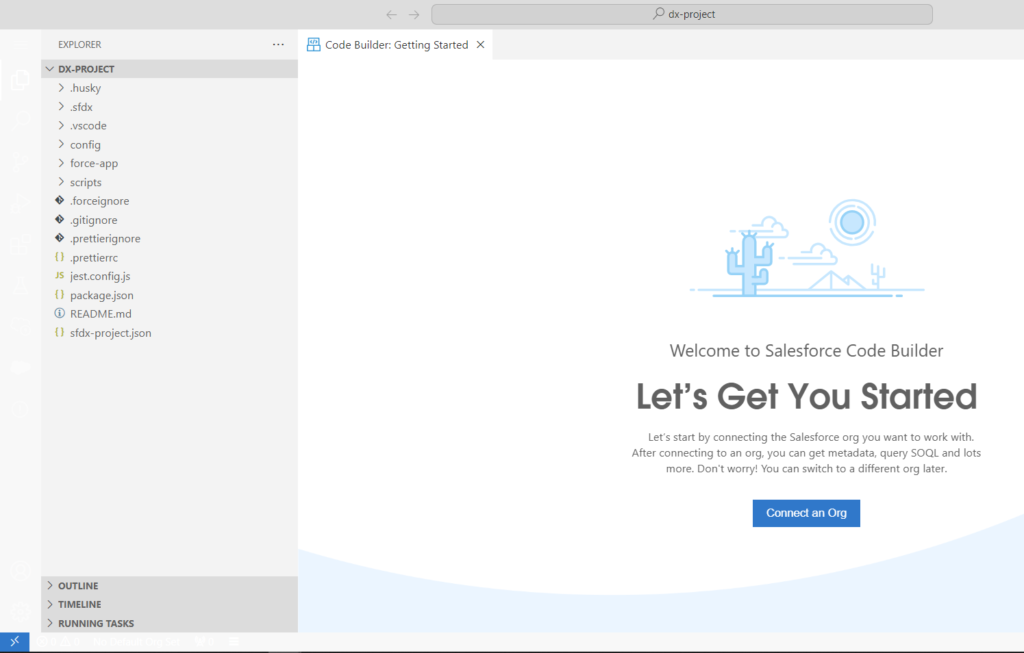
Code Builder instance is then loading in the browser, with an URL address looking like: https://nameoftheinstance-name.fra.001.sf.code-builder.platform.salesforce.com/?folder=/home/codebuilder/dx-project
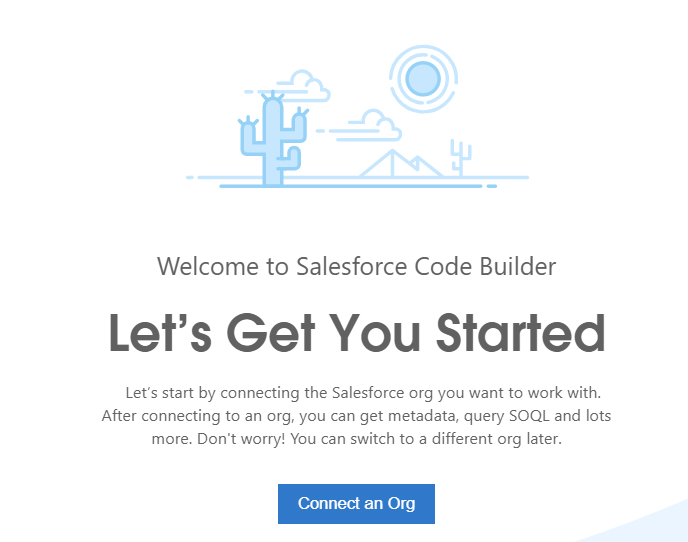
After loading you will see a screen that will ring a bell :
Let’s connect the instance on which you will work (sandboxes) as you would do with your VS Code’s Command Palette
To do so, please follow the following instructions :
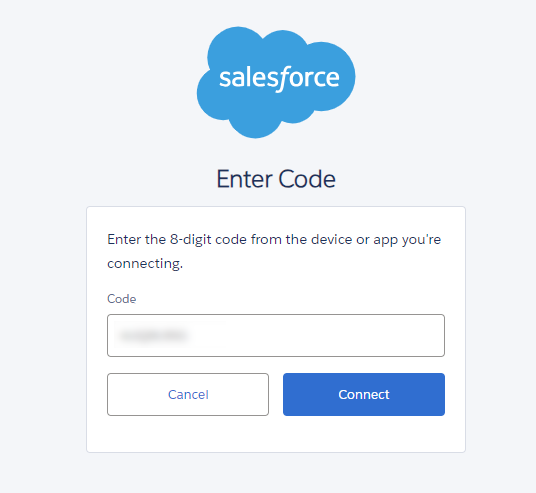
Click on Connect an Org button from previous screen. Then, in the displayed popup, select the kind of sandbox to connect to, as you can do, with VS Code’s Command Palette
Enter an alias to easily determine the instance
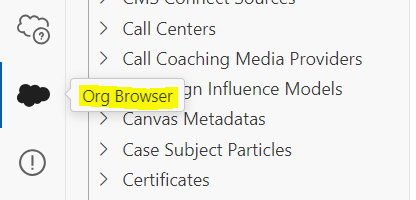
Once the window is loaded (could take a while), please click on the cloud icon, in order to open the Org Browser.
When you choose Open the Org Browser, all the configured instance metadata is retrieved and displayed in your local project under the root directory.
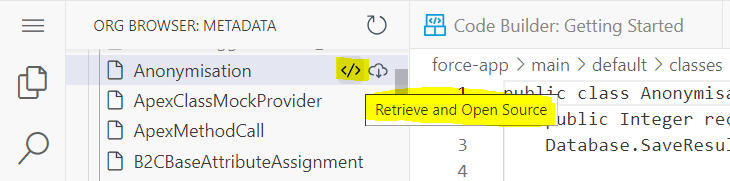
Then to access detailed configuration, choose the metadata in the left panel, and choose to Retrieve and Open Source
Now you can modify and push your code, from CodeBuilder, to your developer sandbox. As in VS Code, be always aware on the sandbox / instance, which your Code Builder is connected to.
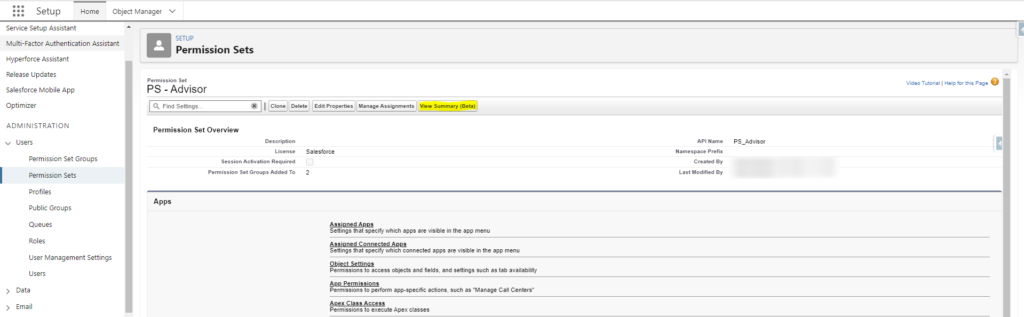
In Winter’24 preview, there is a new feature that is in beta testing, that allows to consolidate and present an overall vision of all permissions present within a given Permission Set.
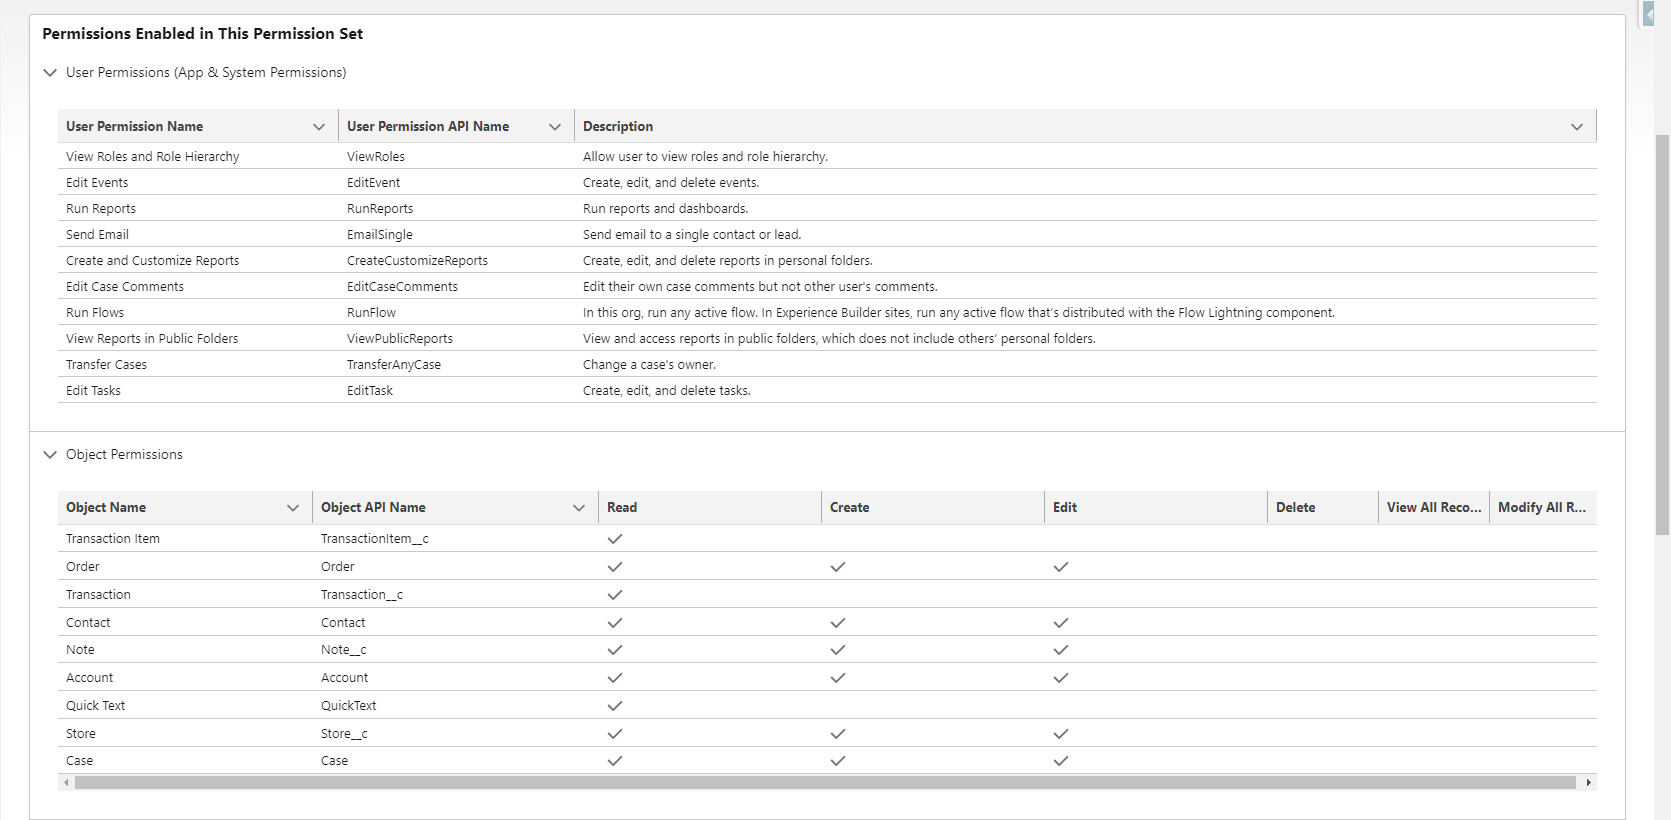
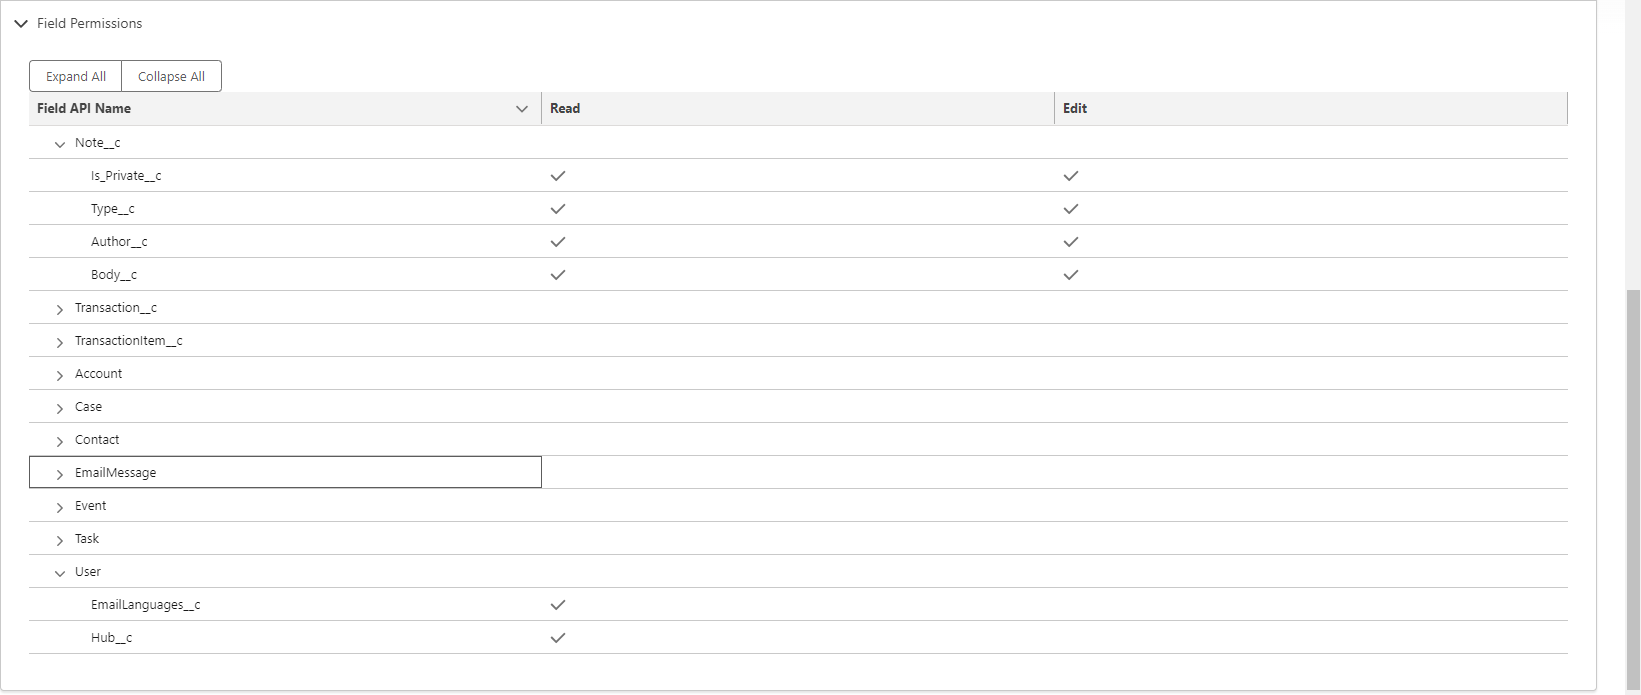
To access this summary, you should navigate in Setup, to the given permission set, and click on « View Summary (beta)«
A complete summary of all included permissions, of this Permission Set, is then displayed, without needing to deep dive in the usual permission menu (that you could see in the grey section of the bottom of the previous screenshot).
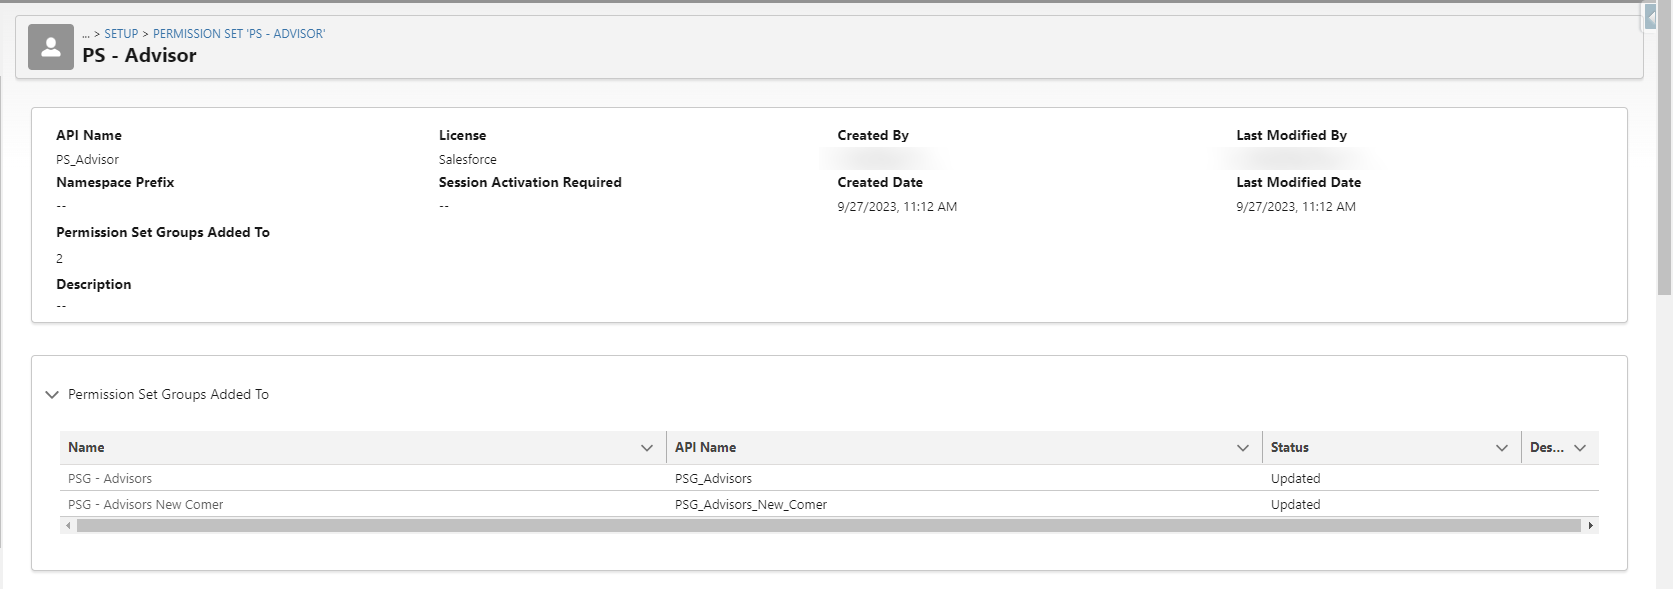
The top section of the page displays :
A first block with the Permission Set summary information,
Information about all permission set groups, which include the Permission Set
The section below presents :
The System Permissions present within the enabled Permission Set (before you had to go to the System Permission sub menu, and scroll through the whole page with all System Permissions, to see which ones have been enabled),
Free Salesforce swag is always something that Trailblazers, Salesforce clients, and Salesforce-addict consultants are looking for… but when it comes to free licences, that’s a whole other issue !
In last TDX2023 (TrailblazerDX 2023) on March 7th and 8th, Salesforce announced the addition of 5 FREE Integration user (= API Only) users for their clients (with Salesforce Enterprise and Unlimited editions), to be deployed, in a phased way as of March 14th, with additional licences at a very challenging price.
And, here they come !!
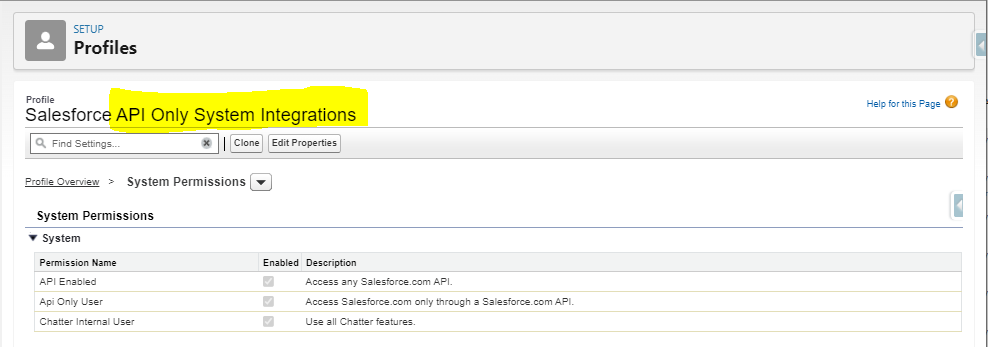
Salesforce, with its last Spring’23 patch 13.1, introduced the Salesforce Integration user license along with a Profile named API Only.
As indicated by its name, this new profile is dedicated to back-office operations / integrations.
5 new licences added for free and available for integration/technical user assignment
Naturally, in past and ongoing Salesforce implementations, Salesforce Architects and Technical Lead still recommend to use dedicated user (with either System Admin or Custom technical-oriented profile) to handle integration use case within Salesforce (still with proper connected app configuration as a best practice).
Each integration type is often covered by a dedicated user (or at least it should be).
That often leads to contexts with up to 3 or 5 dedicated integration users for integrations. Even if is aligned, this way, with administration & security standards, all these users consumes « all included » highly-priced « business » licenses slots.
From an admin point of view, there is no need anymore to create / clone new custom profile (who has cloned it from System Admin profile with out modifying it ? Moreover, who has always handled them directly as Admin ? ). The new API Only profile is here on the shelf.
New Profile – API Only naturally – accessible in Salesforce setup
As it is an « API Only » enabled profile, the users who will be assigned this new profile, will only be dedicated to integration use cases, because users would not be able – as it should always be the case for technical / integration users in order to avoid security-related access issue – to login to Salesforce login page by using the user credentials (that generally never expire, by the way).
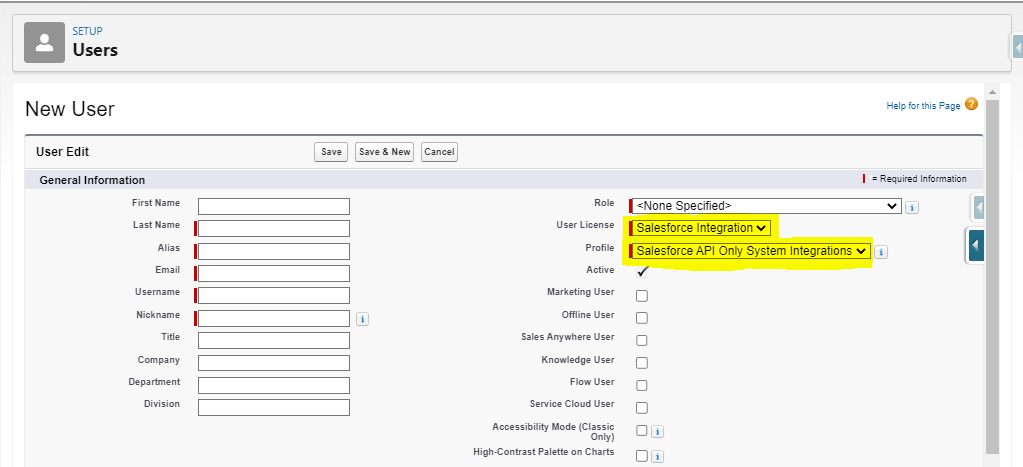
The existing and new users – dedicated to integration use case – are now to be transferred / created with this new license and profile. Have fun & free some licenses !
Just be cautious about :
Automatisms / Apex code / bypass triggers… that may leverage profiles names. They should be taken in account concomitantly with the profile assignment switch to the new license/profile.
Check your integration after your license switch (with non-regression testing) on sandbox before impacting the configuration. Obvious comment, but that does not hurt to write it 😉
License and profile are available, as the others, in user creation setup page
For information, to be complete, an known issue has been logged by Salesforce, because some clients, who had already created a custom « API Only » profile with the same security idea, have encountered issues in their code. The issue is currently handled by Salesforce and will be solved in an upcoming patch.
In addition :
A Integration licence will be available in Developer Editions to test the feature
For customers who would need additional licenses, it will be possible to buy additional licenses at a very challenging $10 per user per month price (current public licences price shared by Salesforce).
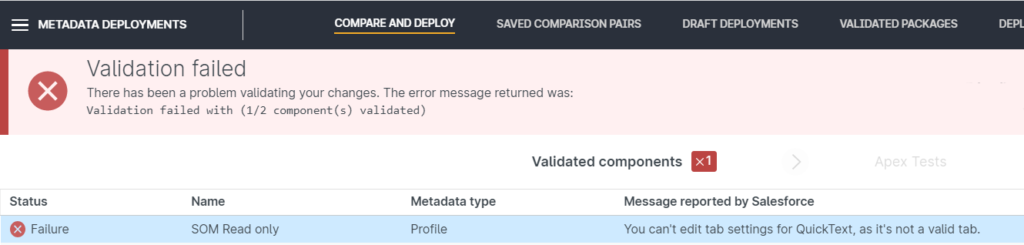
When deploying profiles to Salesforce, if you ever encounter « You can’t edit tab settings for QuickText, as it’s not a valid tab. », that probably comes from a configuration discrepancy between your Salesforce source and target instances.
« Quick Text »-related error, when deploying profile (here with Gearset solution)
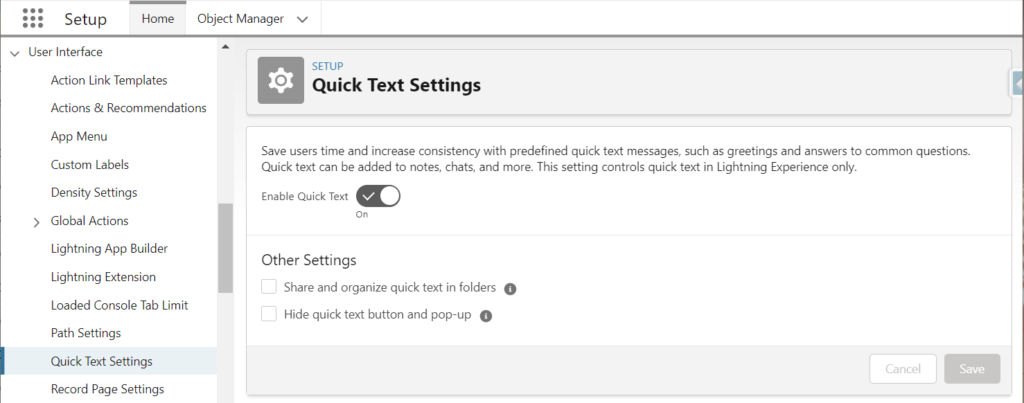
This setting is already enabled in « Lightning version » setup page.
« Quick Text » activation setting in your well-known setup page (User Interface > Quick Text Settings)
As Salesforce help mentions, only Classic instances, with chat enabled, have this setting automatically enabled. Otherwise, you will need to activate it manually, as done below.
So do not forget to switch to Classic, and to activate it too.
« Quick Text » activation setting different from Lightning’s one
Once both settings are enabled, you can keep on deploying your Salesforce project ! Our QuickText issue will disappear as it appeared.